To my other GT6
pages.
April 5, 2020
Gauges
I believe that all GT6 and Spitfire cars were
delivered with just fuel and coolant temperature gauges.
This is a shame, since many people consider a full compliment of
gauges sort of a hallmark of a real sports car. Never mind
that the Smiths gauges of the era were not really known for
their precision, accuracy, or longevity. In fact, much of
the time, they probably weren't much more informative than idiot
lights. Still, we sports car enthusiasts have our
expectations.
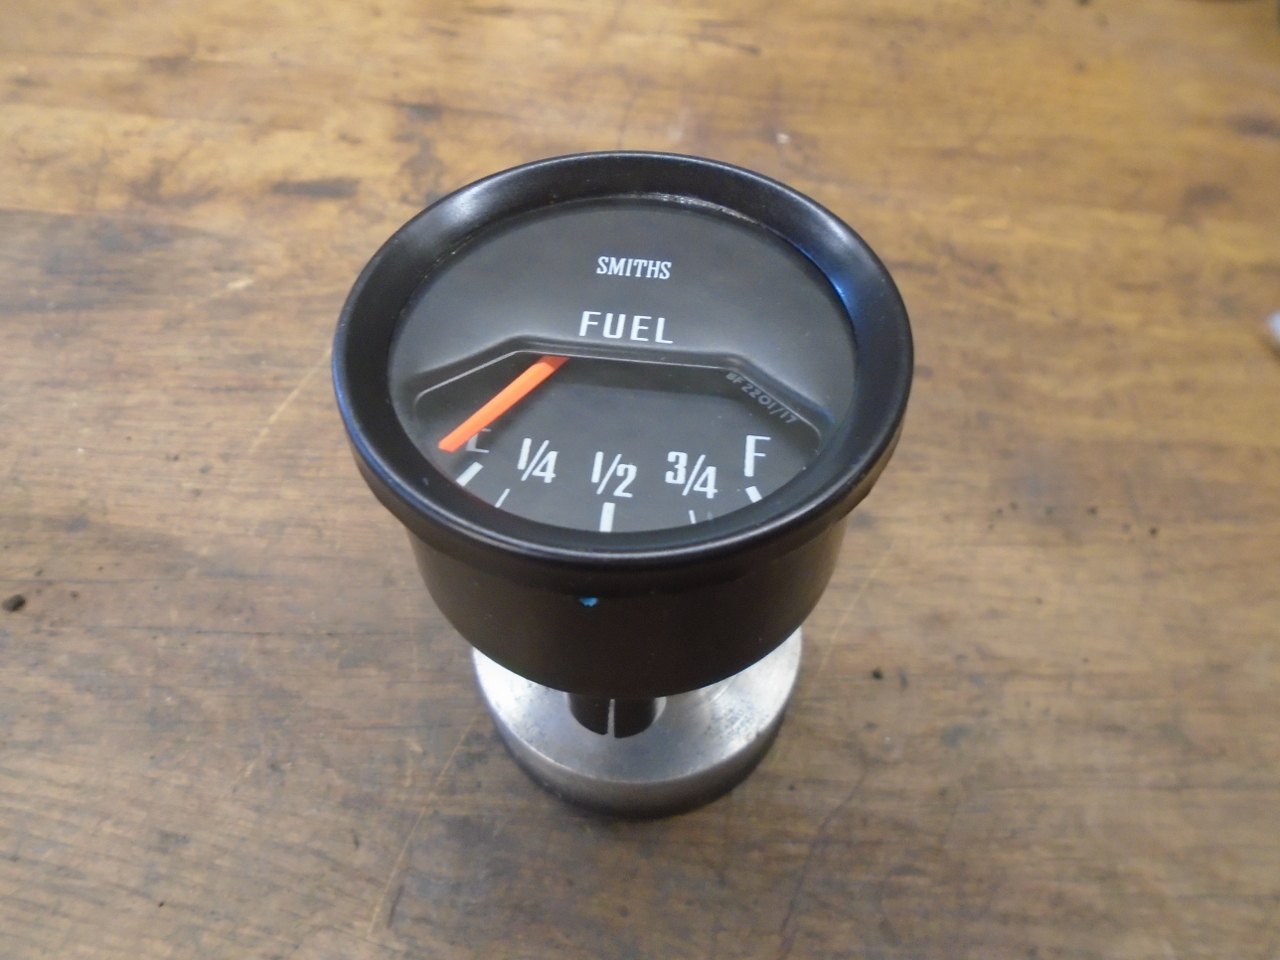
My gauges were pretty crusty. I didn't know if they worked
or not.


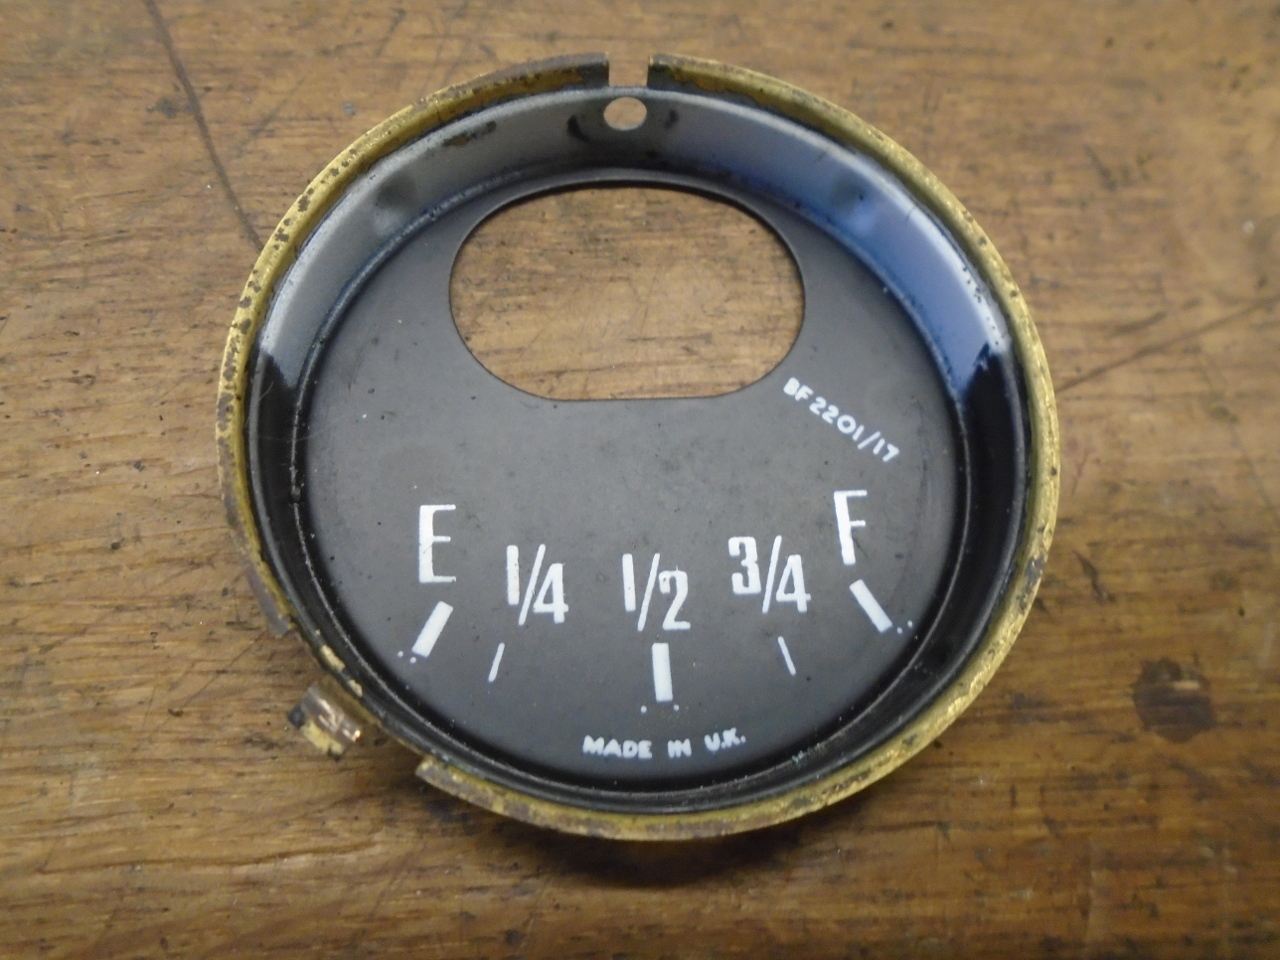
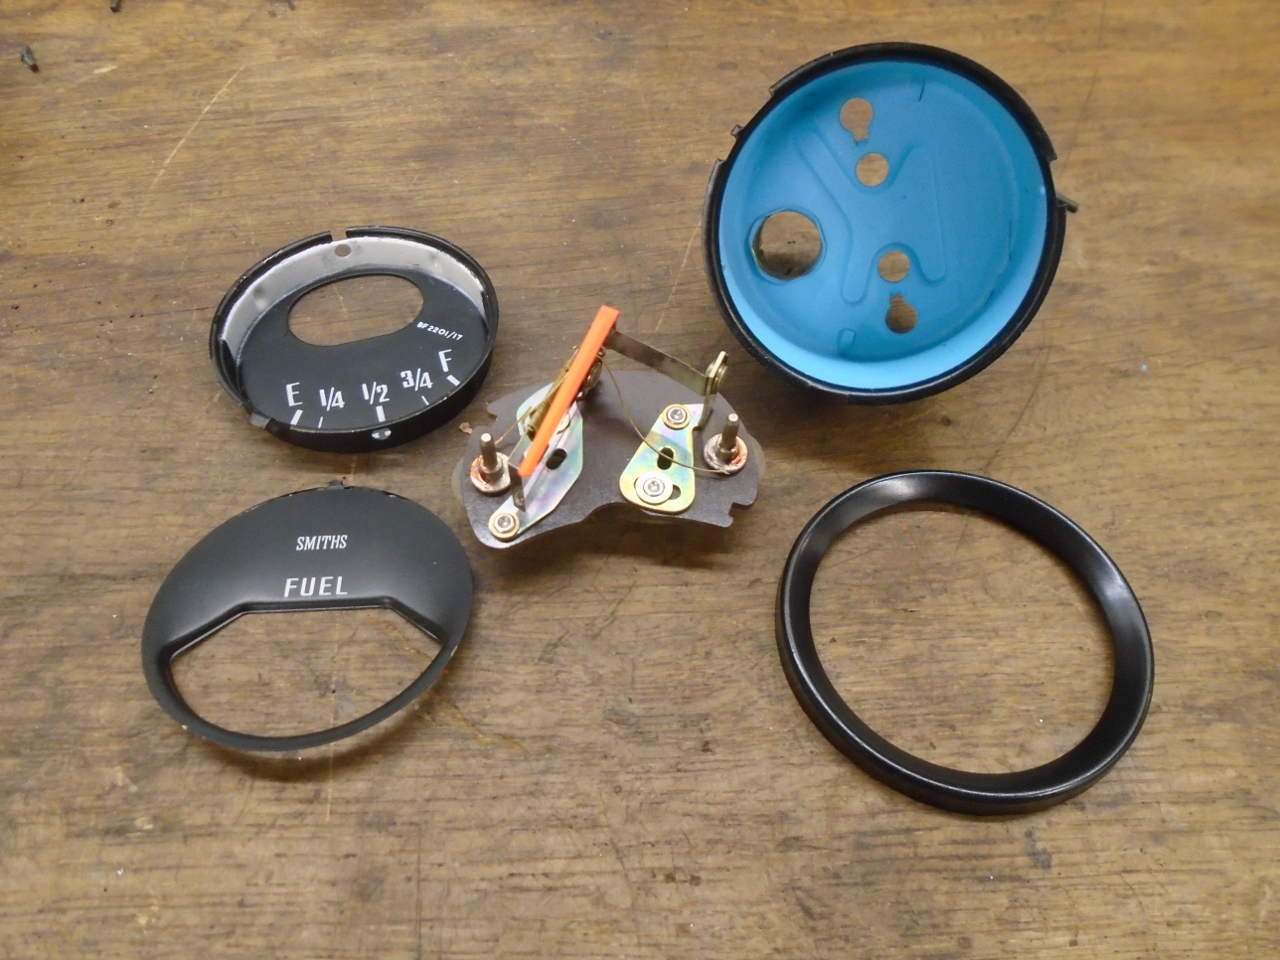
The bezels twisted off after a little coaxing, revealing under
the glass a two-piece dial face. Under the face is the
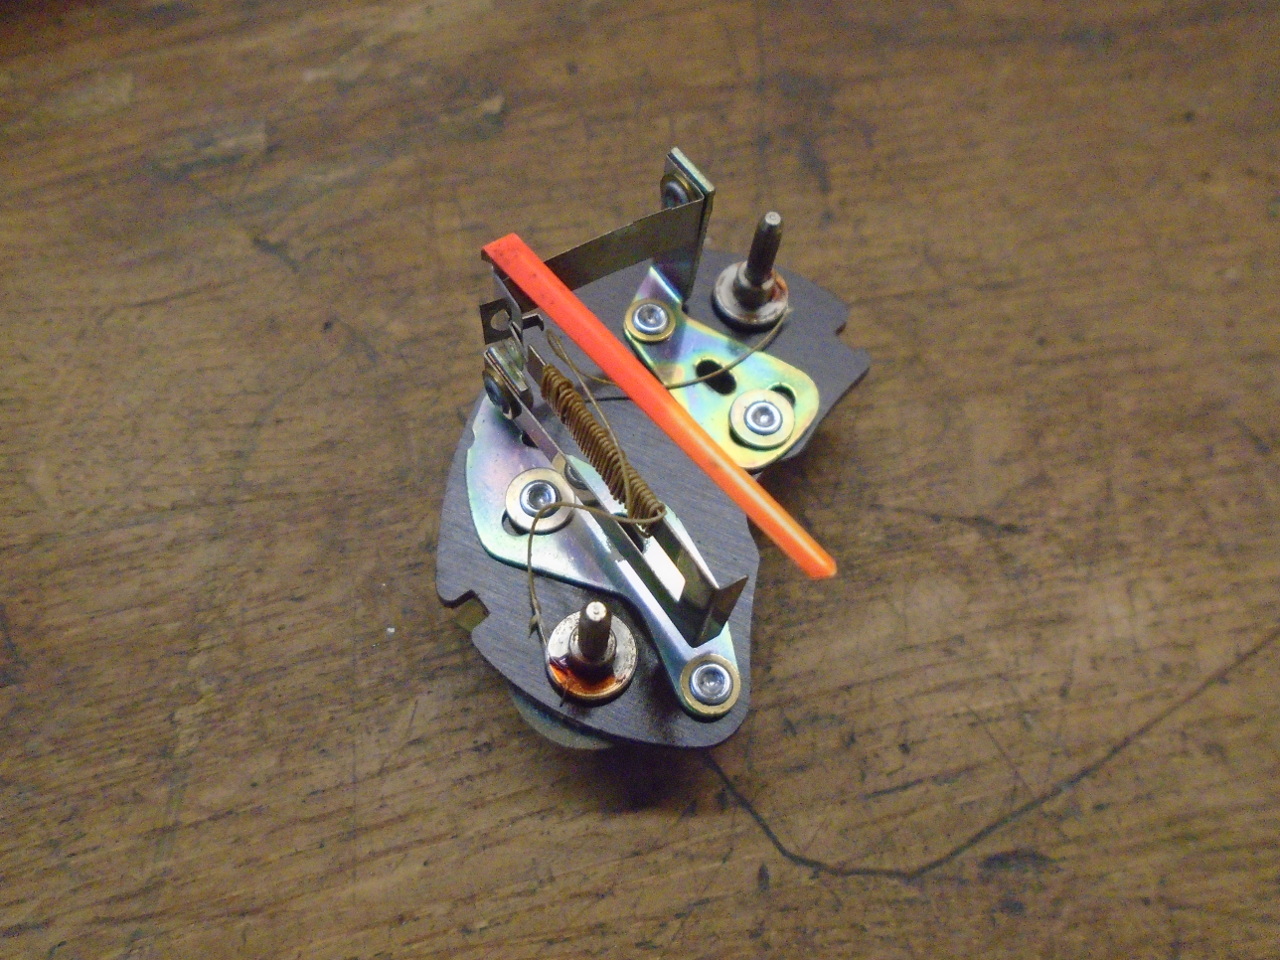
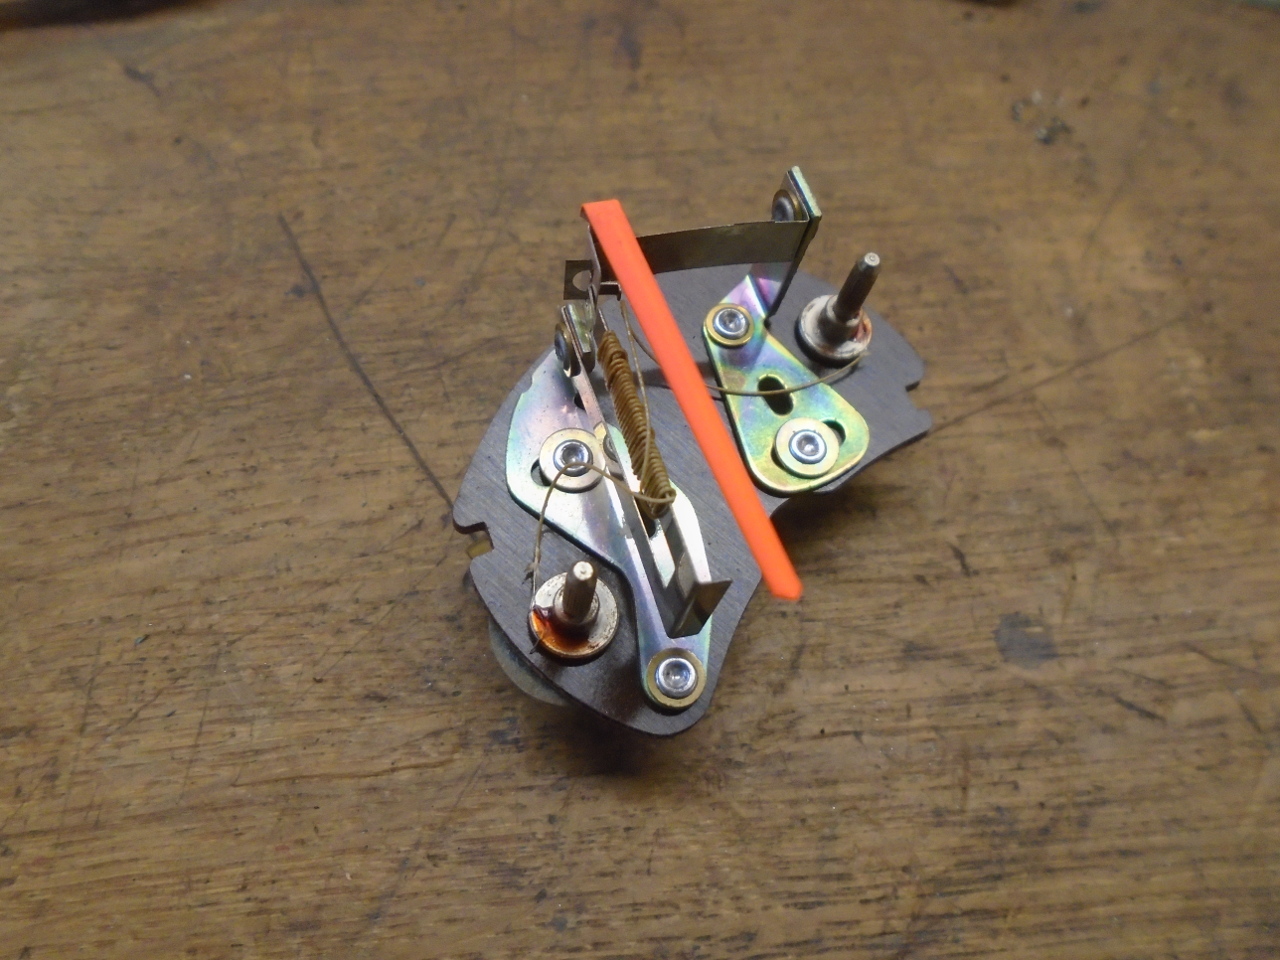
actual gauge mechanism. These gauges are actually thermal
instruments. A voltage presented to the gauge terminals
causes a current to flow through some thin resistance wire
inside the gauge. The wire is wrapped around a bimetallic
strip. The resistance wire heats up in proportion to the
voltage, and causes the bimetal strip to bend. The motion
is transmitted through a linkage to the dial pointer. I'll
show the restoration process for the fuel gauge, but the
temperature gauge is identical.

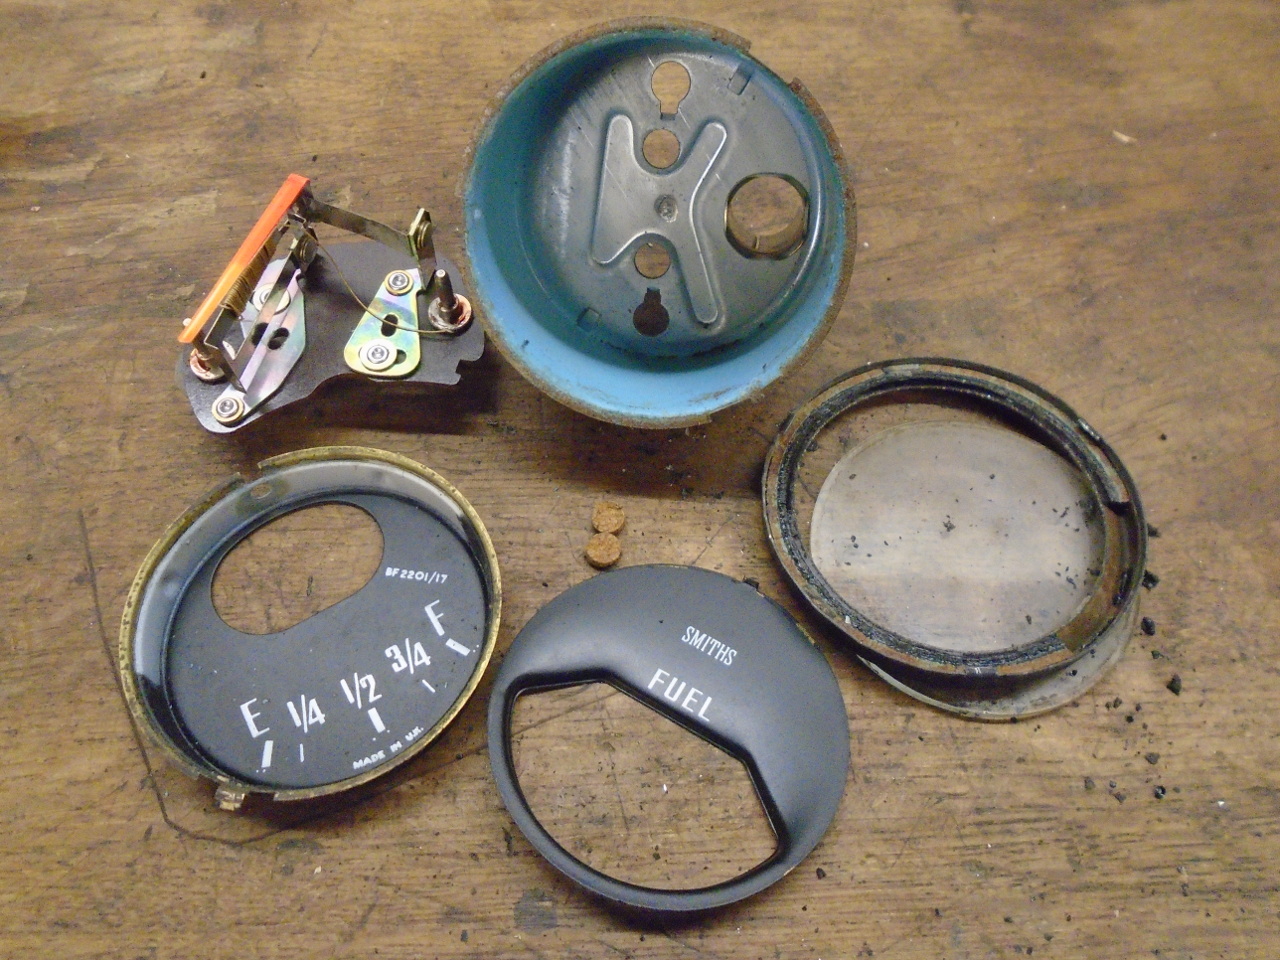
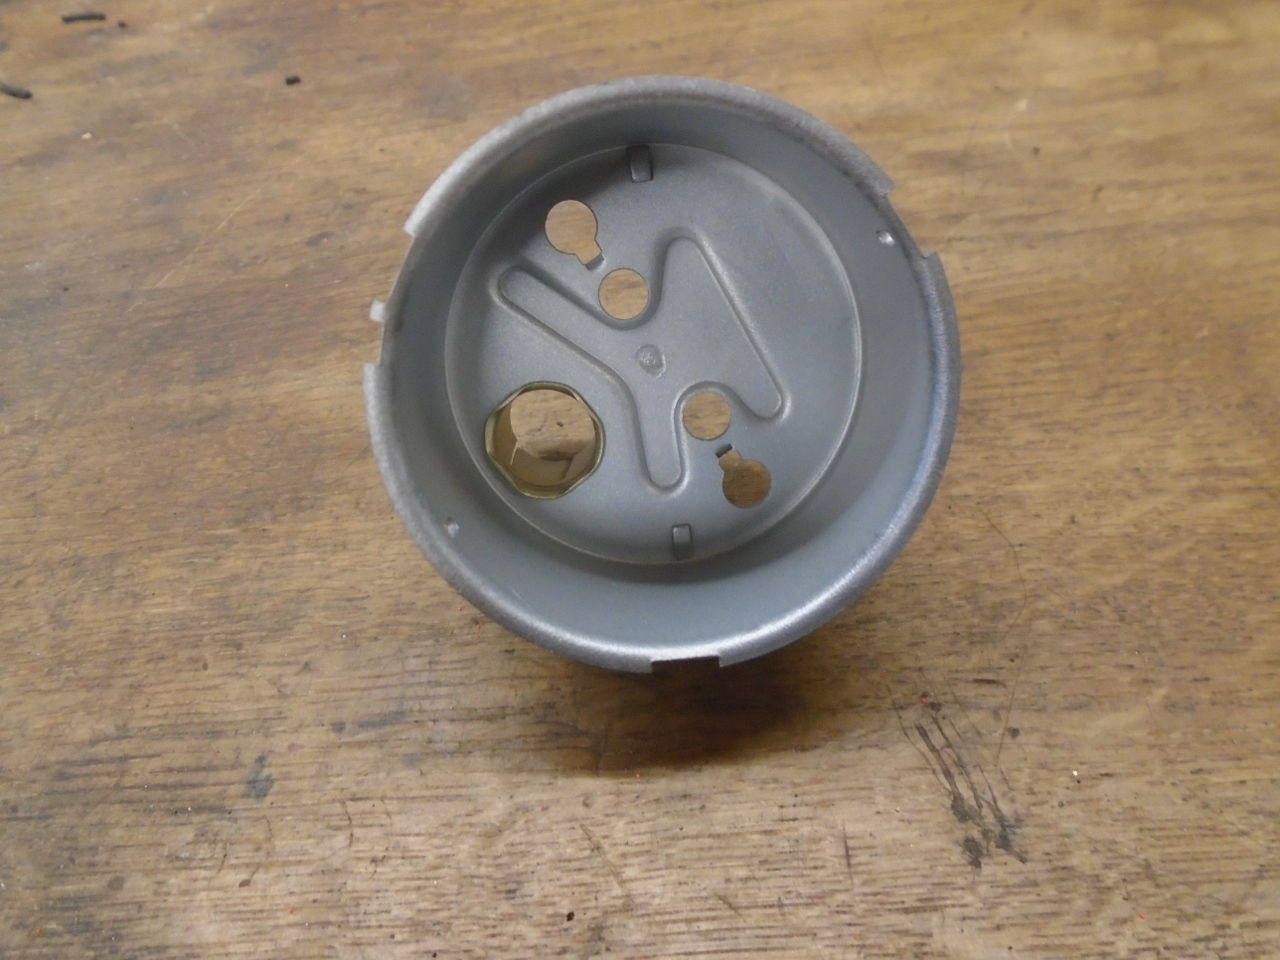
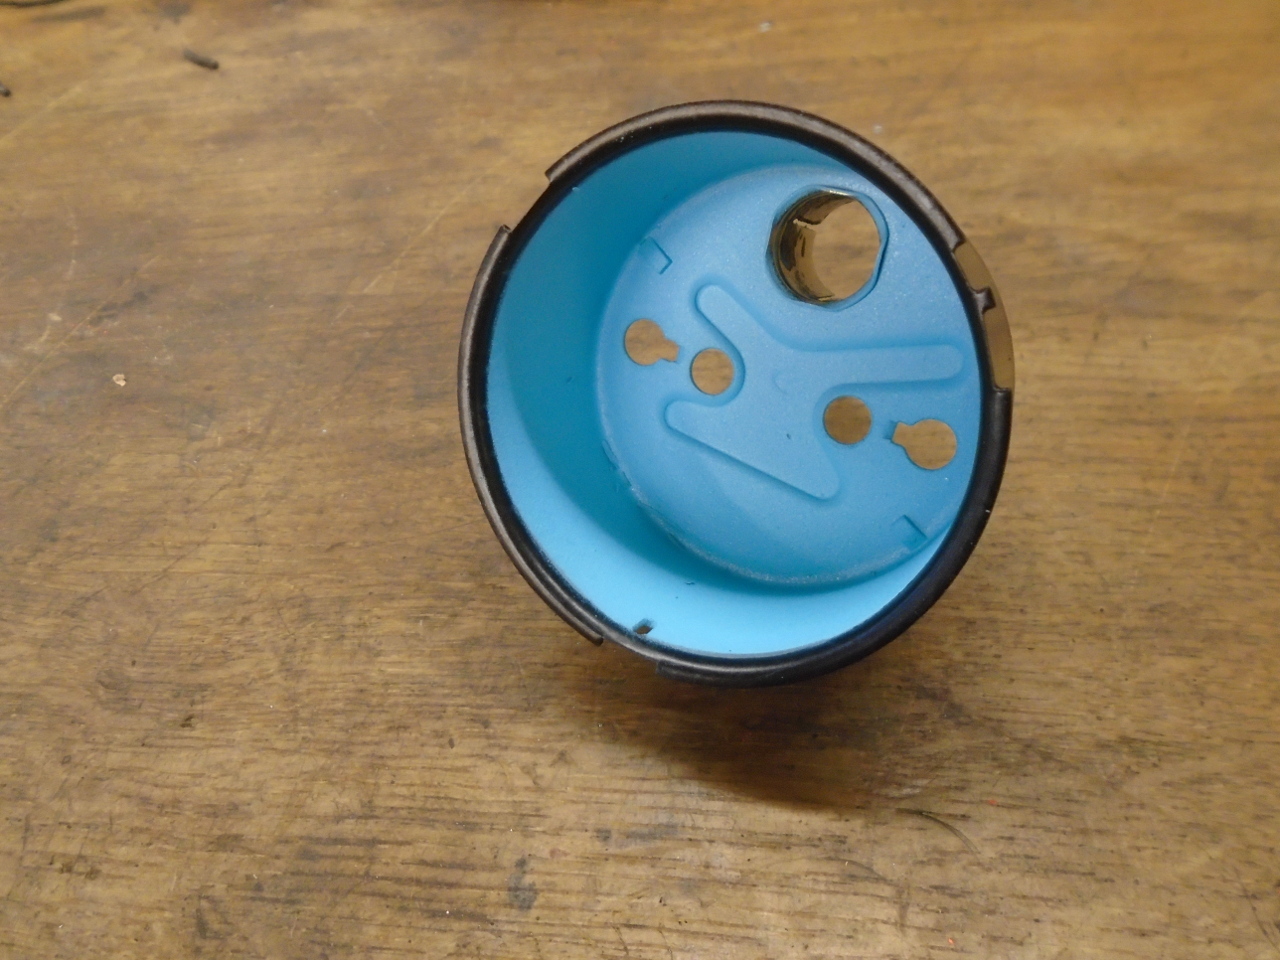
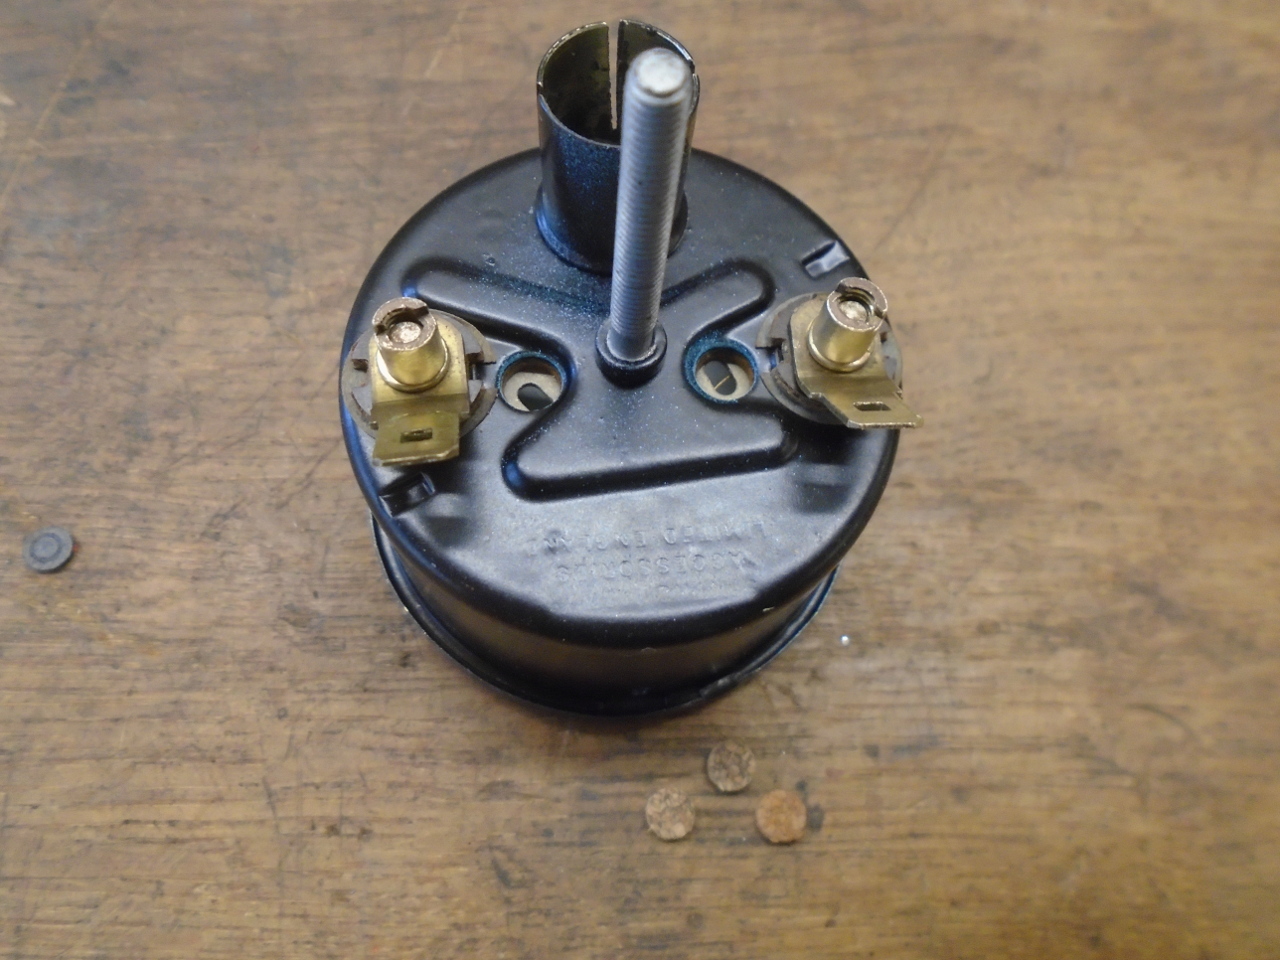
The metal housing was a little rusty on the outside, and was
painted blue on the inside, apparently to tint the light from
the small incandescent lamp that is pushed in from the
rear. I blasted it clean...

...then powder coated the outside, and painted the inside with a
tasteful blue pretty close to the original.

The actual guts of the gauge looked fine, except for the
pointer. It was pretty faded on the part exposed to the
light of day. The protected part looked like a fluorescent
orange. I found something that was pretty close.
The dial faces actually looked pretty good. I just cleaned
them, touched up a few areas, including the white strip along
the top. I presume this was a reflective surface to get
light down onto the face.
Then put everything back together.
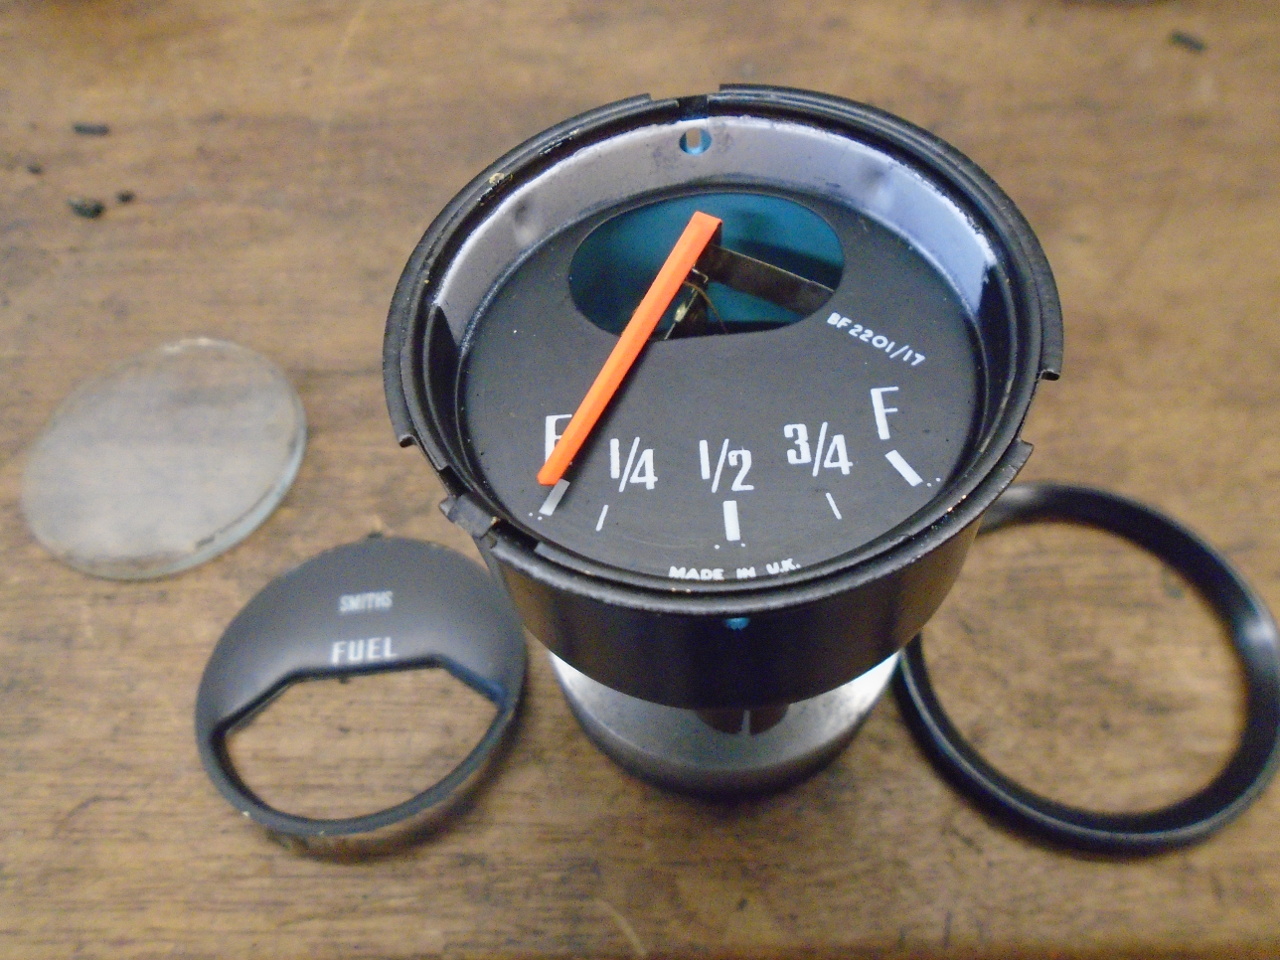
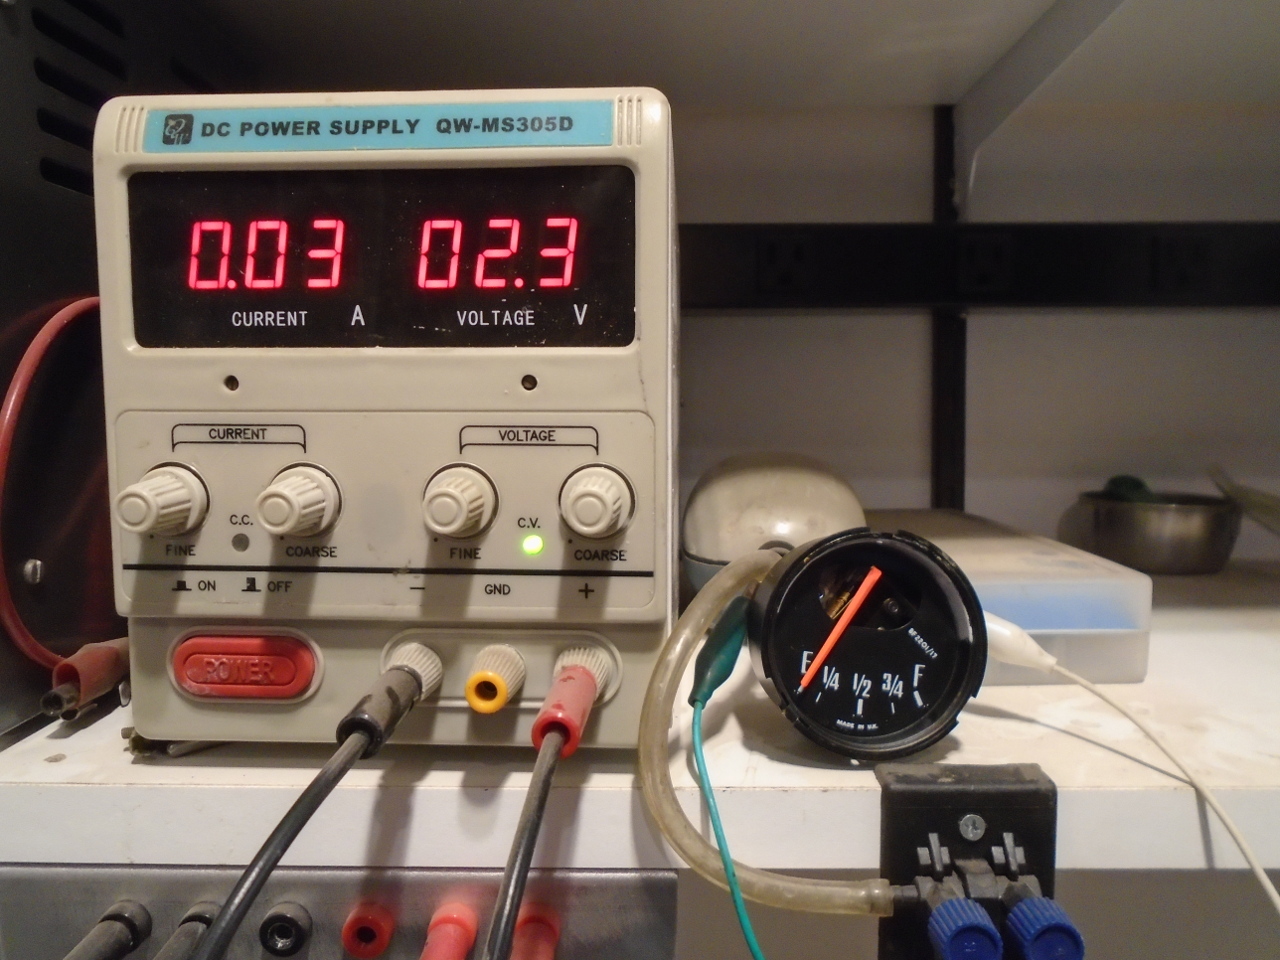
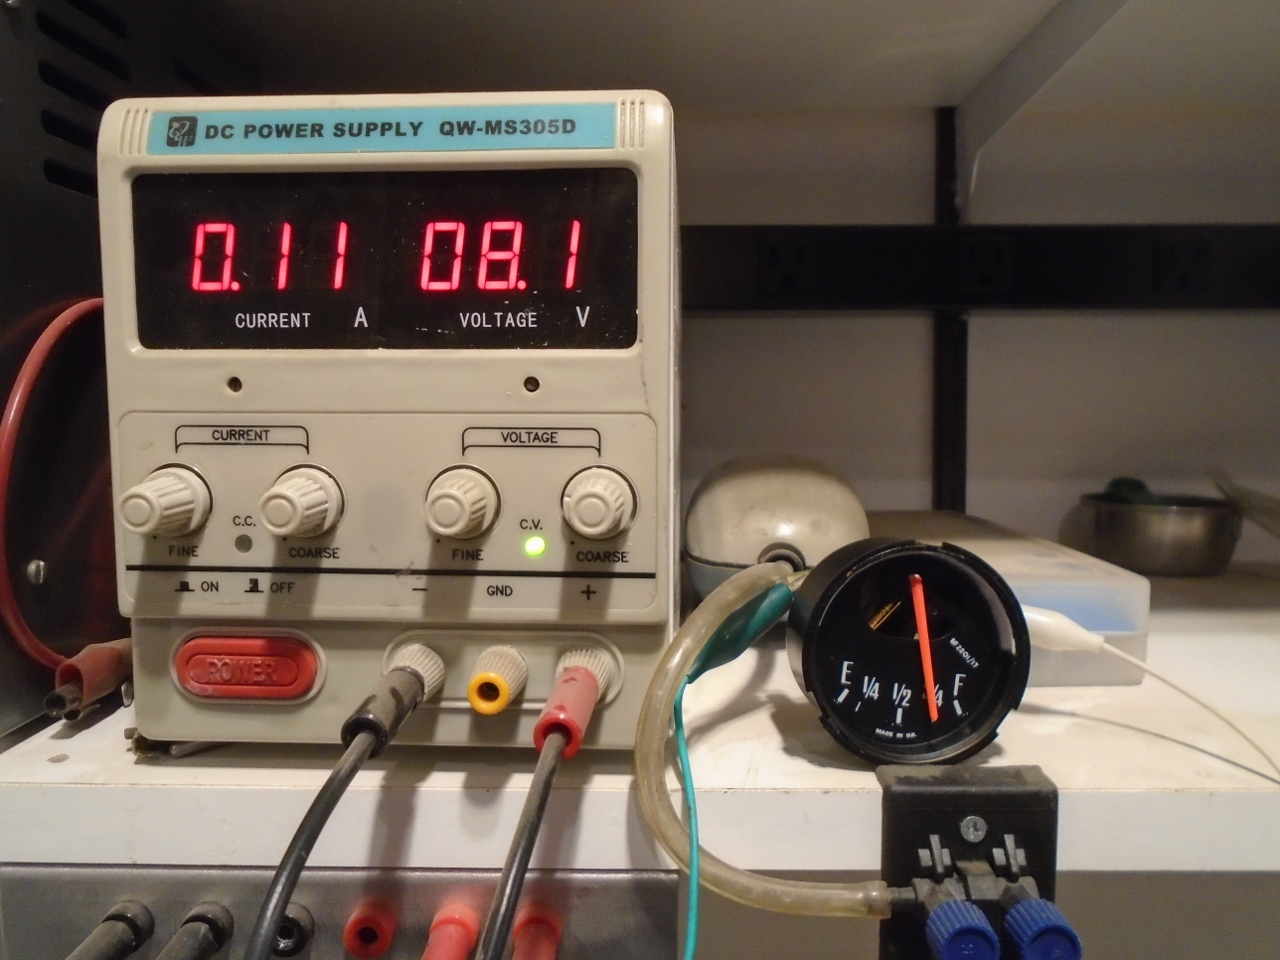
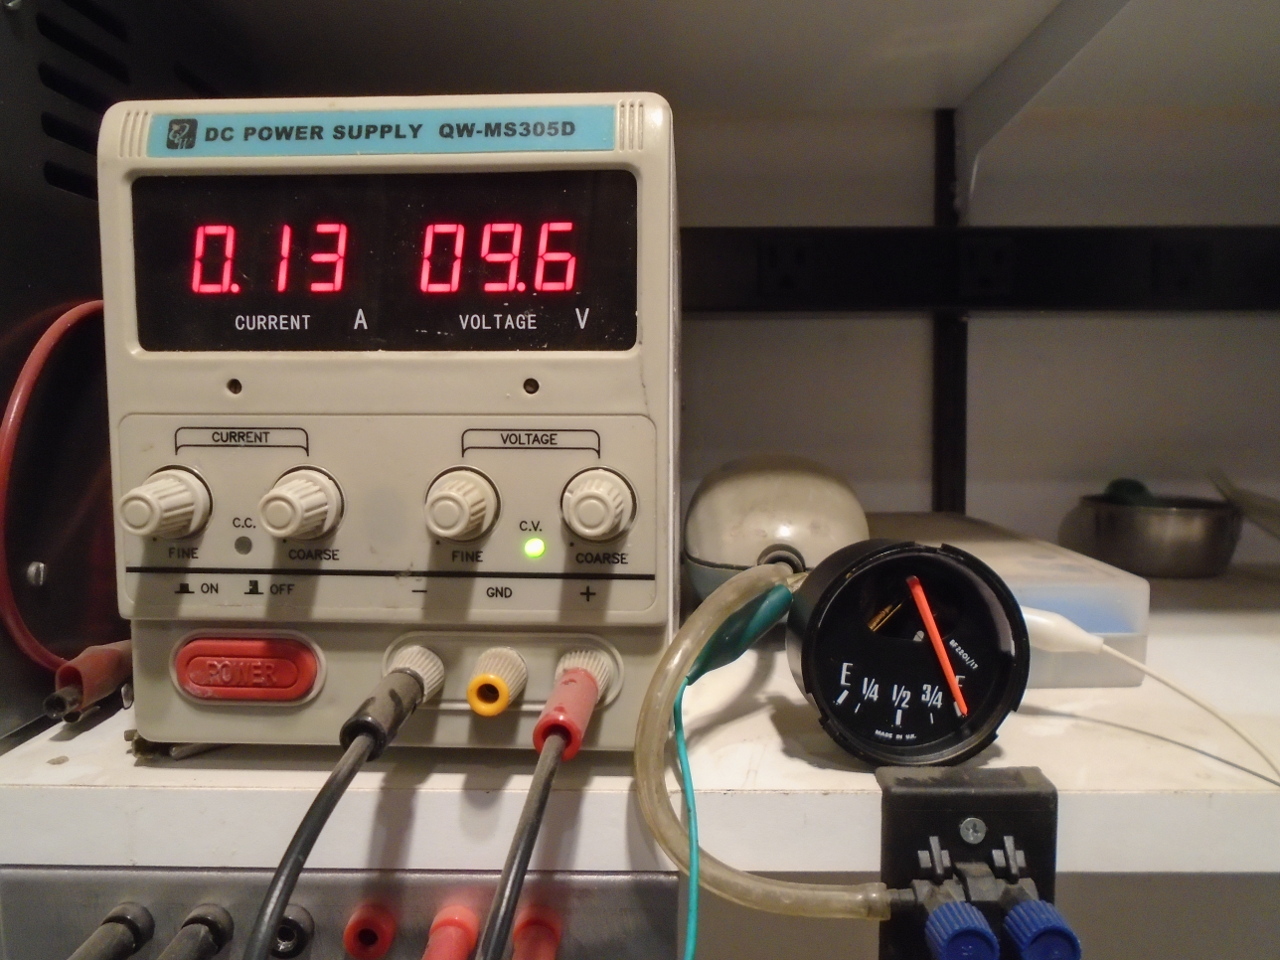
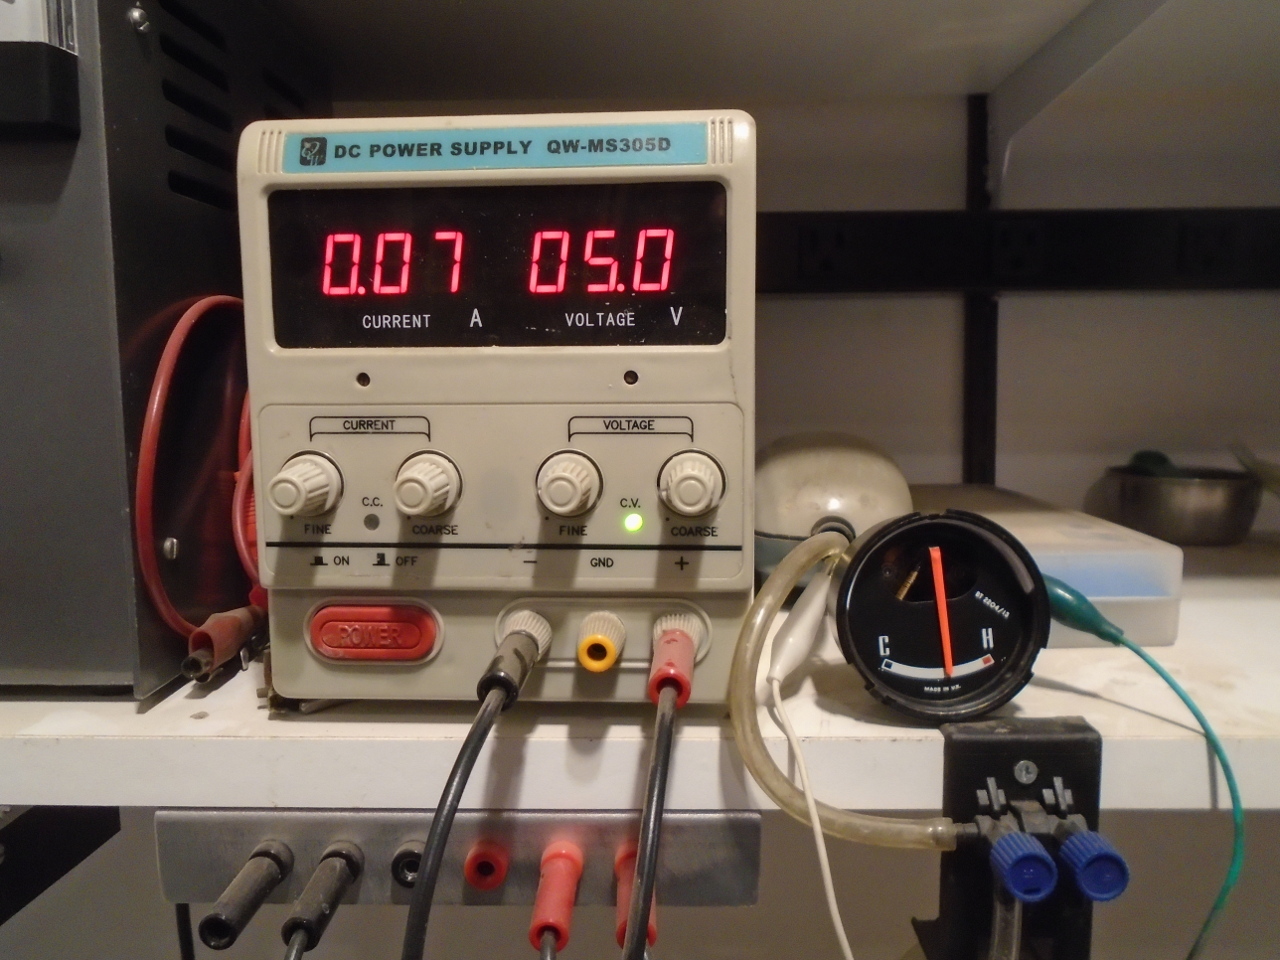
Before adding the glass and bezel, I thought it probably wasn't
too soon to actually test the gauge to see if it even worked and
was anywhere close to accurate. It did work, and after
some fiddling with the calibration slots on the back, I got it
close to the way I wanted it. I didn't have a tank sender
to test with, so I just used known voltage inputs. In
operation, the voltage the gauge sees is some fraction of the
ten volts from the voltage stabilizer. The fraction
depends on the position of the float in the tank sender. I
like to have a gauge that shows empty before the tank actually
runs dry. It's a little like having a reserve tank.
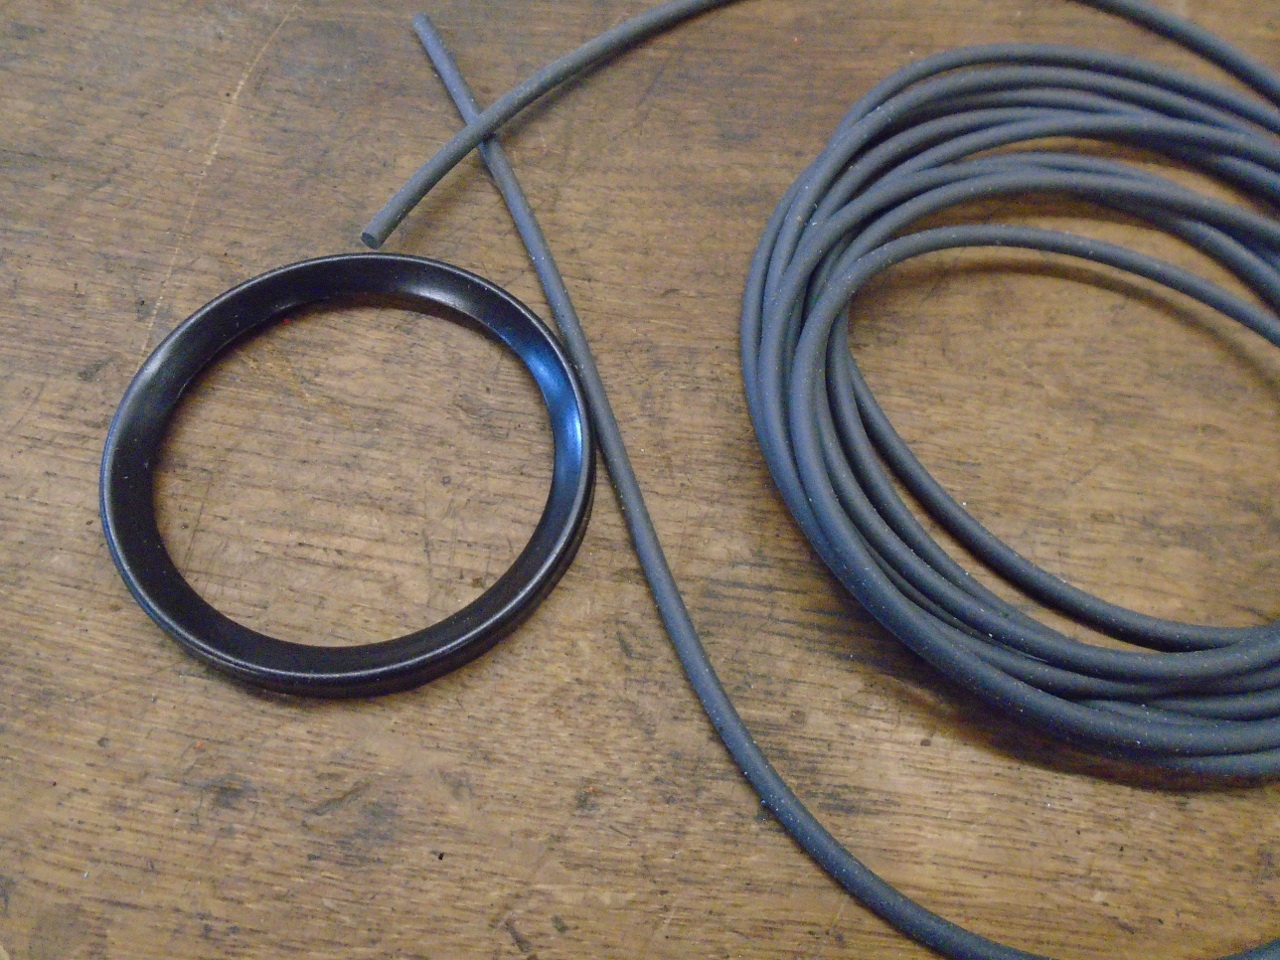
Then it was time for the repainted bezel. I used some
silicone rubber O ring stock as a seal. A little petroleum
jelly makes sure it won't catch and bunch up when twisting the
bezel.
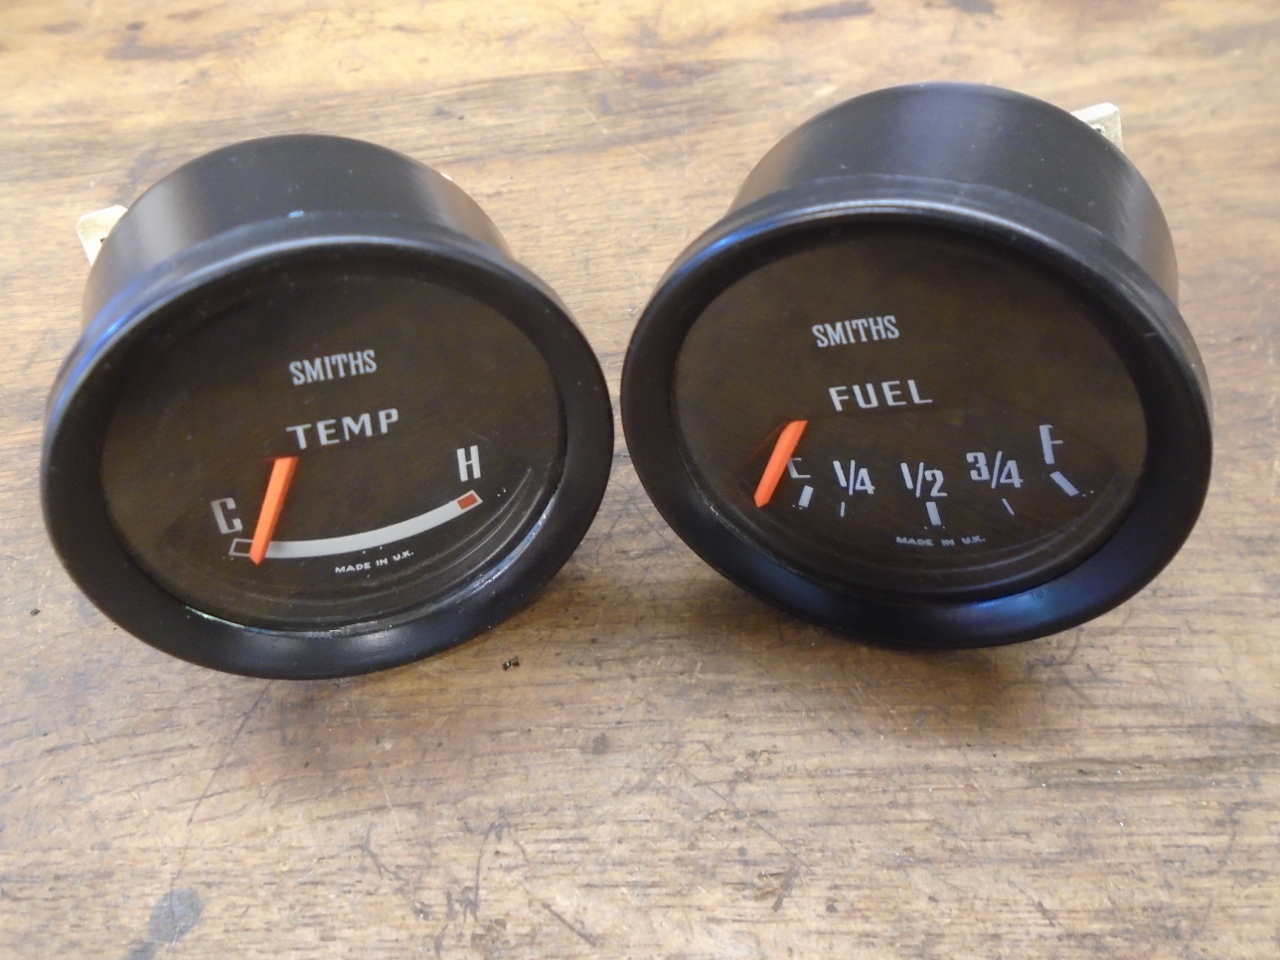
The final gauge.
These are the calibration ports in the back of the case.
They get covered by those little cork plugs that are almost
always missing.
The temp gauge was a re-run of the fuel gauge. Again, I
didn't have a sender to test with, so I set some reasonable
calibration points. I may have to revisit this if it is
too far off.

The twins.
What I said earlier about it being a shame that the GT6 didn't
come with a more complete complement of instruments was more
than idle moaning. At some point, I decided that my car
will have proper instrumentation. So I put out some
inquiries, and a week or so later, thanks to some kind folks on
the 6-Pack forum, I had a Smiths vintage oil gauge and
voltmeter. Both of these gauges in general looked better
than mine.
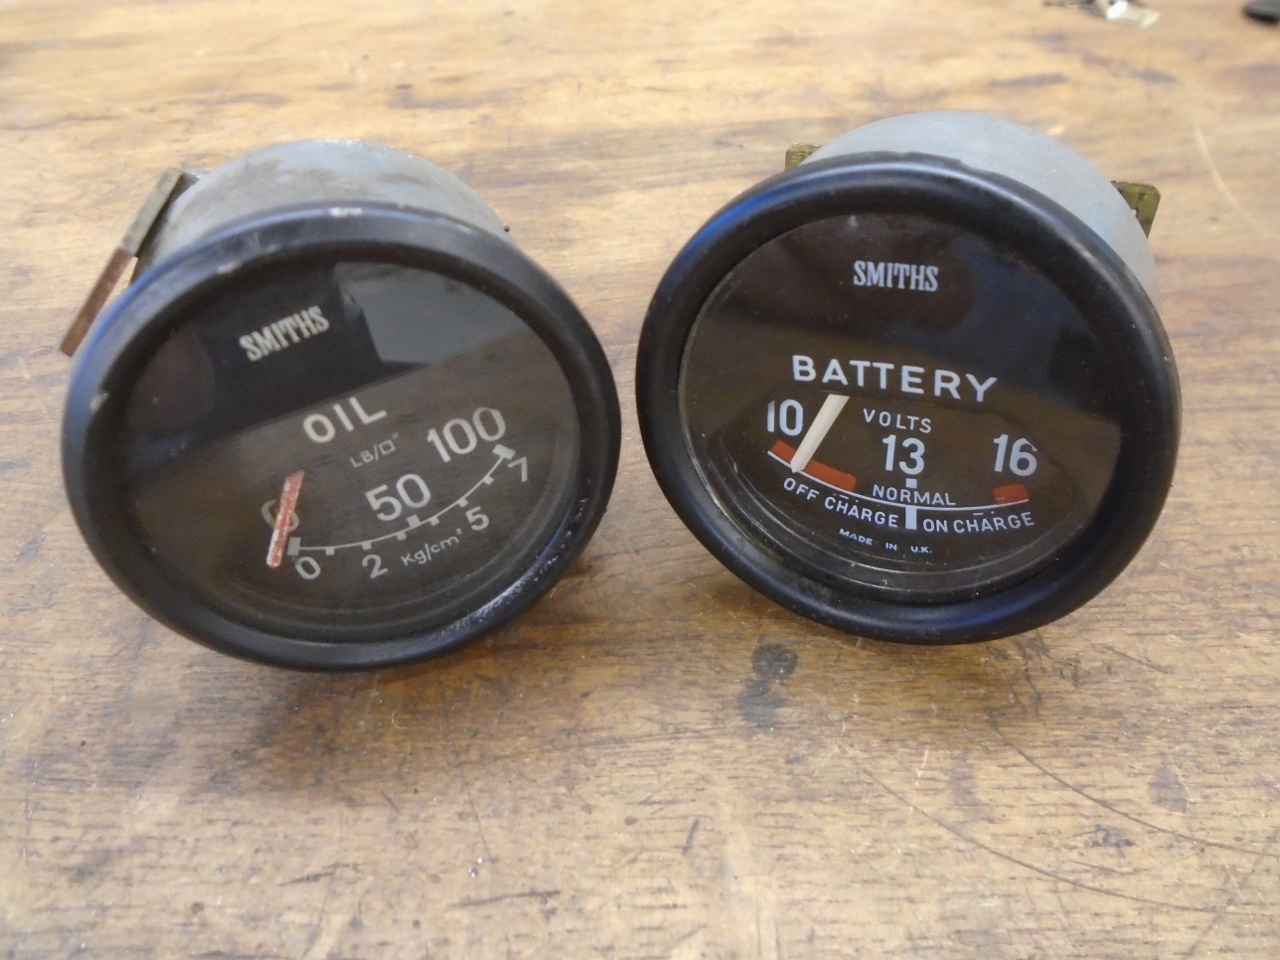
Smiths made quite a lot of variants of these gauges over the
years, so getting a perfect match is not easy. The new (to
me) gauges have a different bezel shape, and different
fonts. I ordered new bezels to match my originals, but the
fonts are something I may just have to come to peace with.
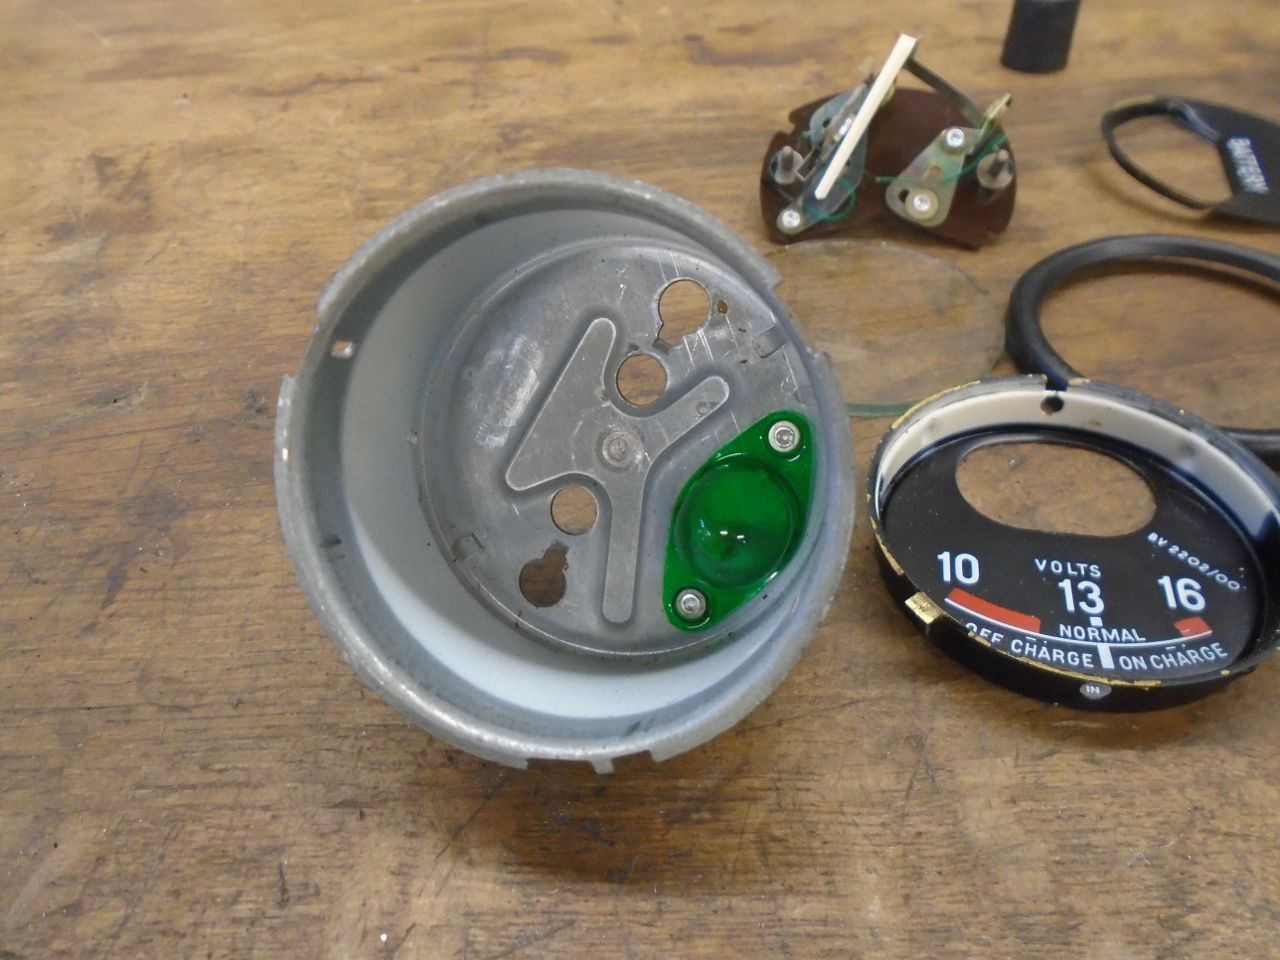
The gauges got the same treatment as the originals. The
voltmeter had a green lens for the illumination that had to be
removed.
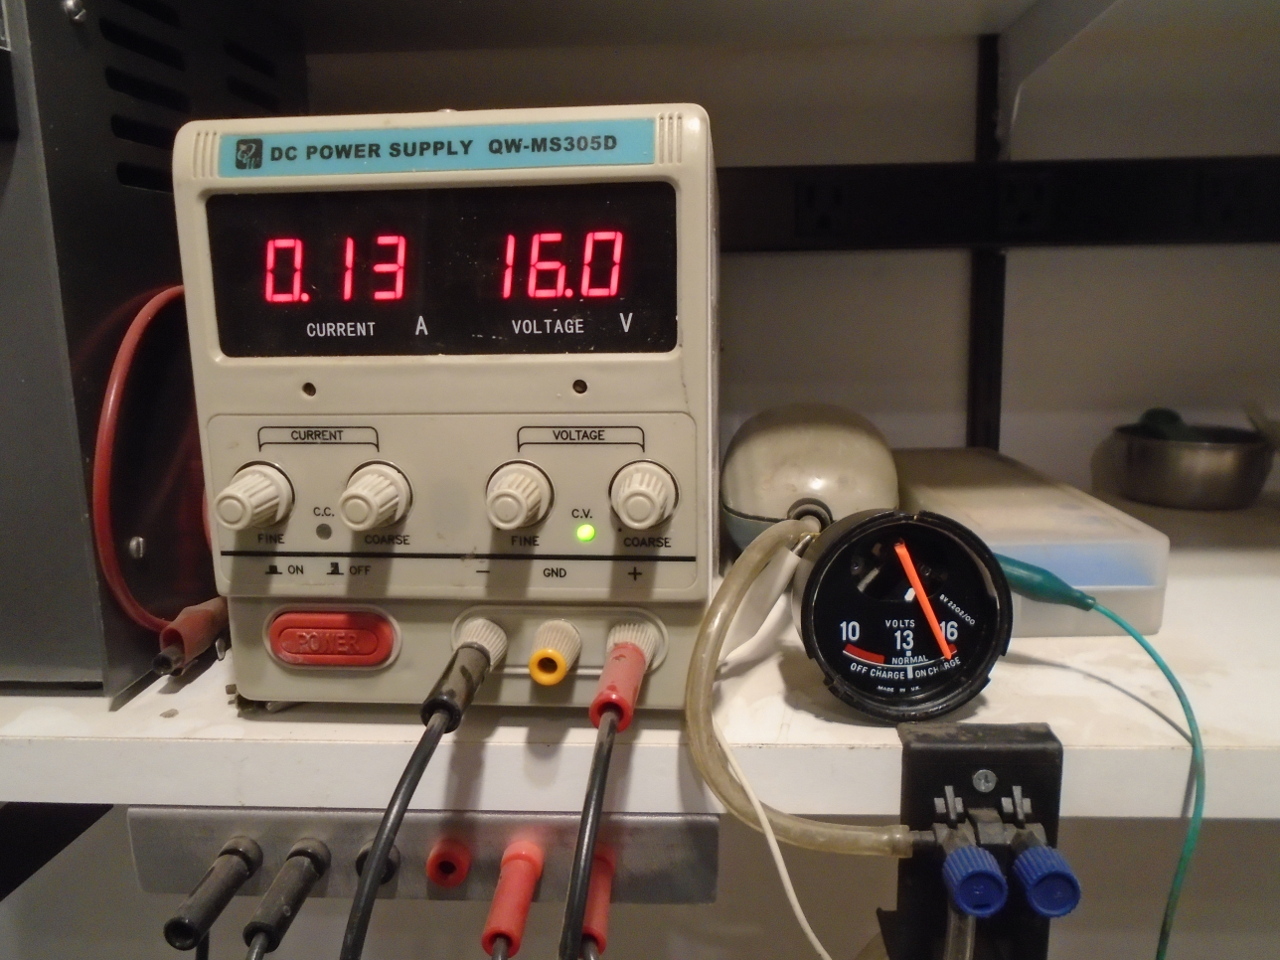
It was also fairly out of whack on calibration, but I got it
pretty close in the middle of the scale. It's still a ways
off at 10 volts, but I don't think that's very important.

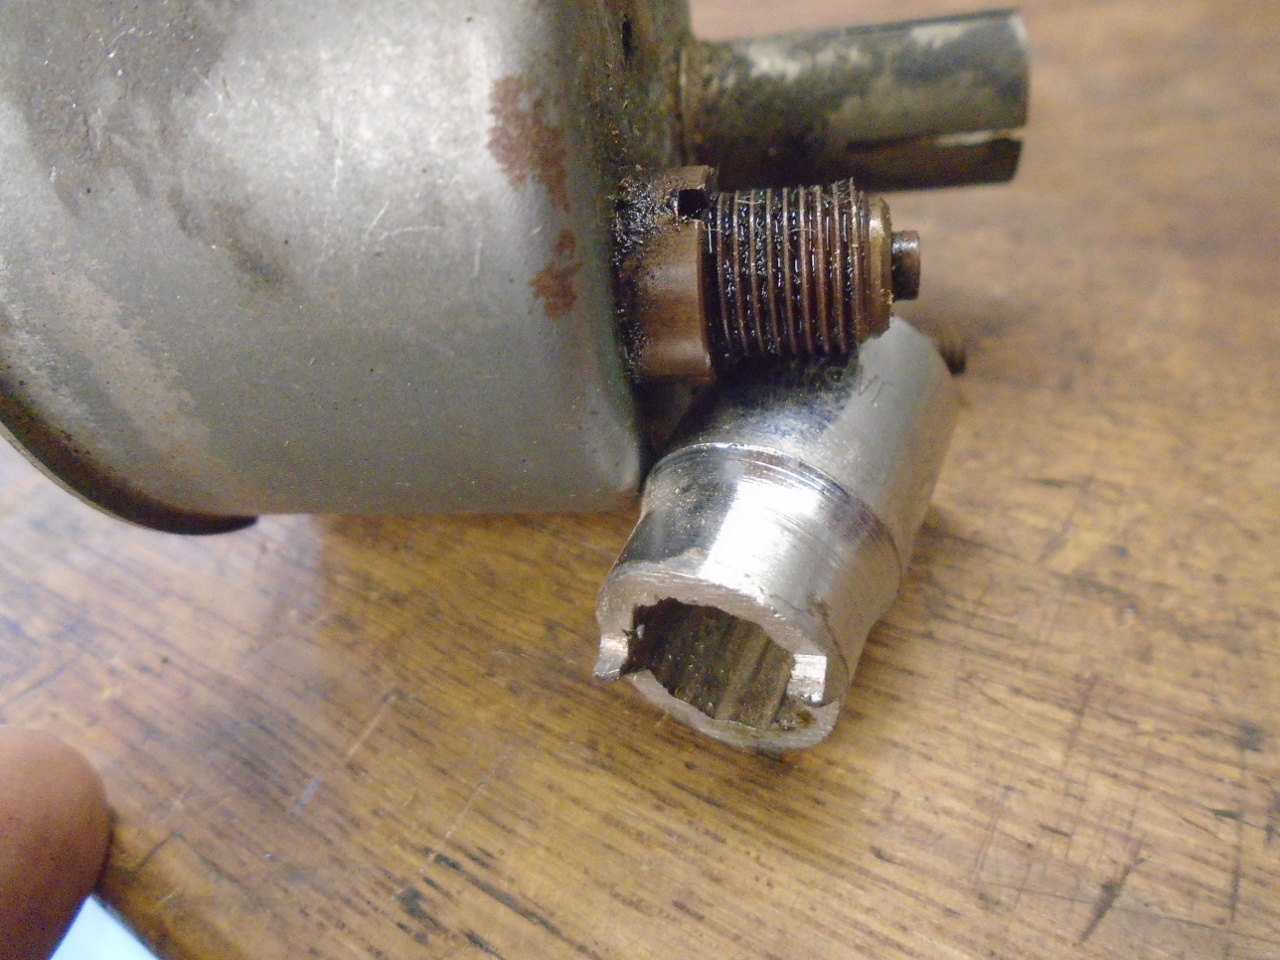
The oil pressure gauge is completely different inside, since it
is a mechanical gauge and not an electrical one. The first
hint of a difference is the nut holding the guts in place.
A sacrificed socket became the "special tool" required to remove
it.
The oil gauge uses a Bourdon tube. It is just a curled
tube into which oil pressure is transmitted. The pressure
tends to straighten the tube, and the deflection is linked to
the pointer.
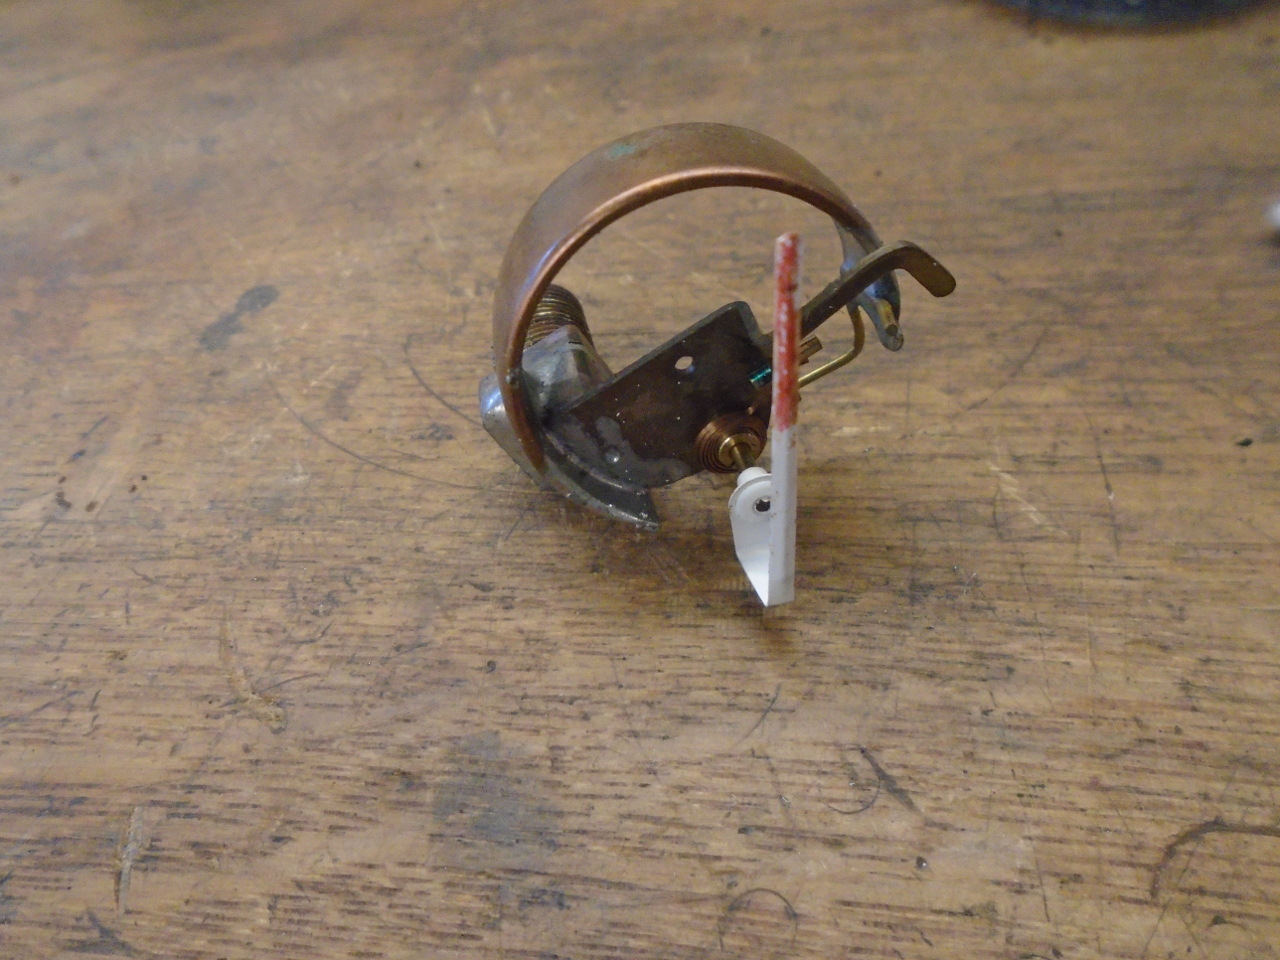
The parts of the oil gauge ready for assembly

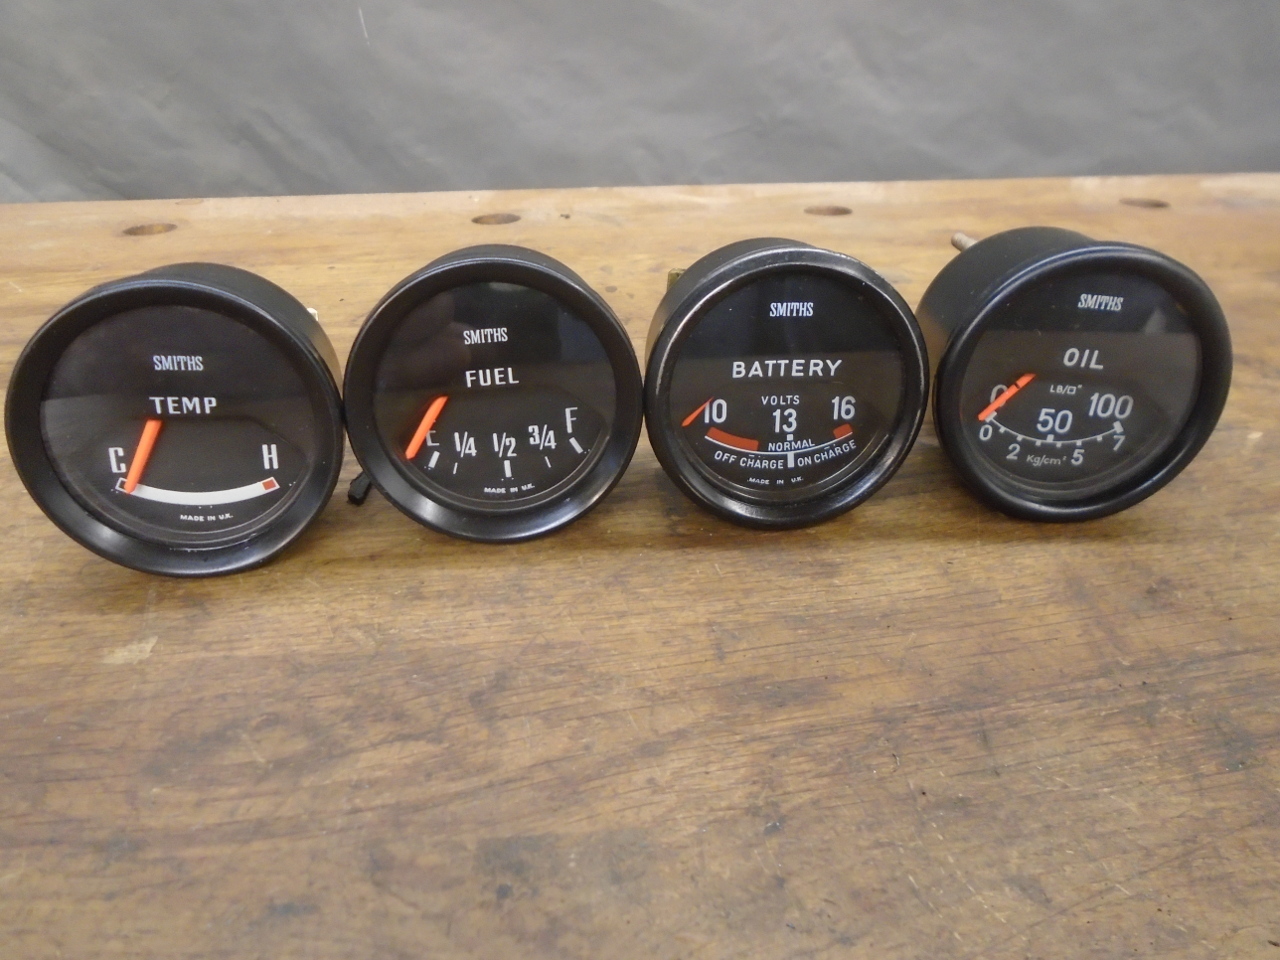
The four sisters. I don't quite know where the new gauges
are going, but I'm noodling it.
This was a fairly quick project. I'd done it once before
on my TR6, so I sort of knew what to expect. Other than
the cost of the "new" gauges, the outlay was minimal--pretty
much just some consumables.
Comments to Ed at elhollin1@yahoo.com
To my other GT6
pages.