To my other GT6 pages
January 23, 2023
Sun Visors
A standard fitment in most cars is some sort of adjustable shadowing
device to block bright sun and glare for the driver and front
passenger. These are almost universal in the way they work. A
flap is mounted on an arm fixed at one end above the windshield.
The flap can be stowed up against the headliner, or flipped down to
block sun. The arm can also typically swing outward to block sun
from the side.
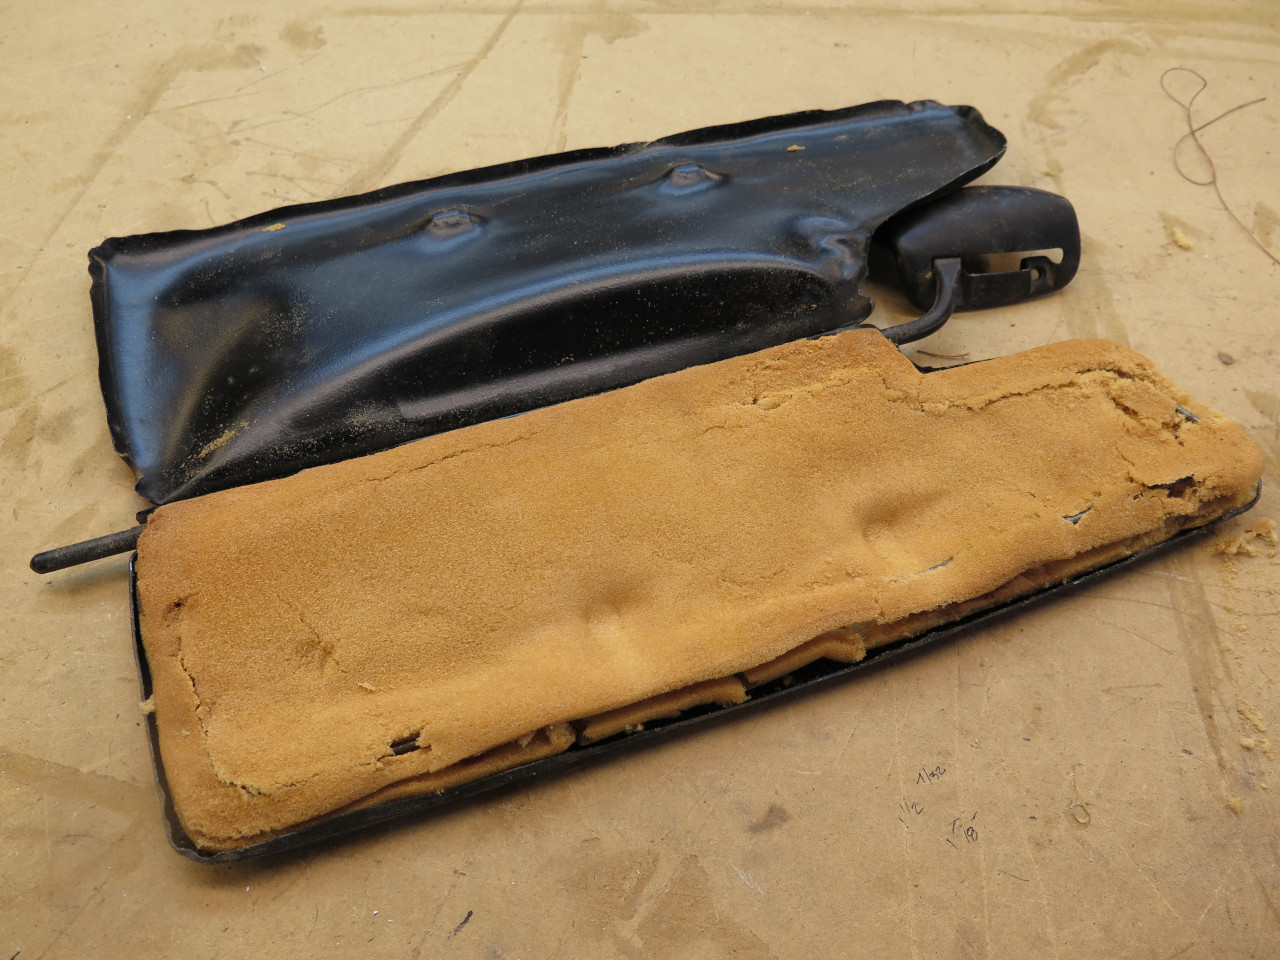
Called "sun visors", the ones in the GT6 are totally unremarkable.
They consist of a light metal framework covered with foam padding and
thin vinyl. Mine were dirty and misshapen, but all there.

Though I could tell that they were once padded, they were now saggy and
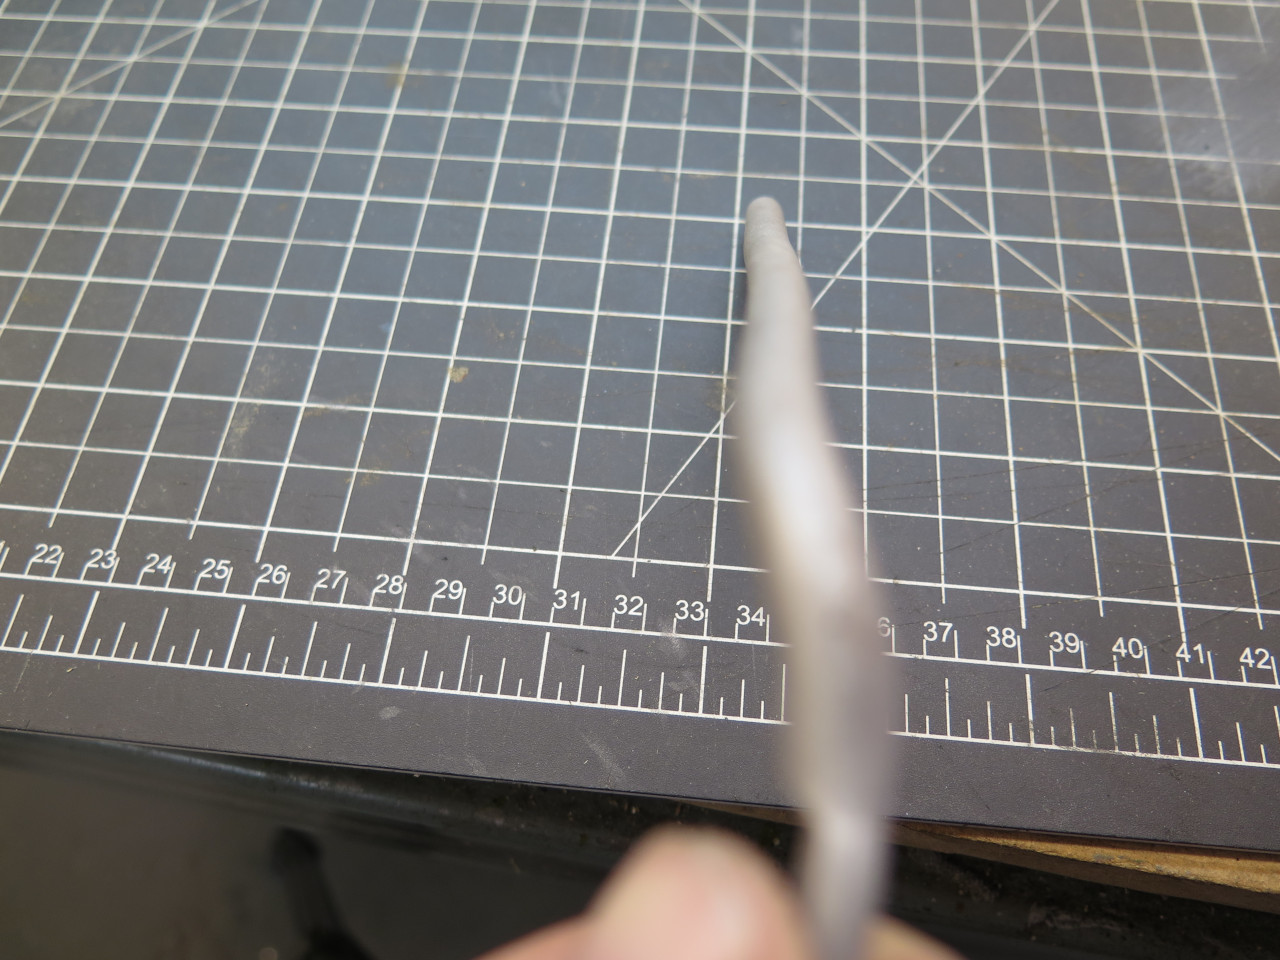
crunchy when squeezed. The vinyl appeared to be heat welded around
the perimeter, then trimmed. Cutting one of the visors open
confirmed that the foam was deceased. It turned to crumbs when handled.
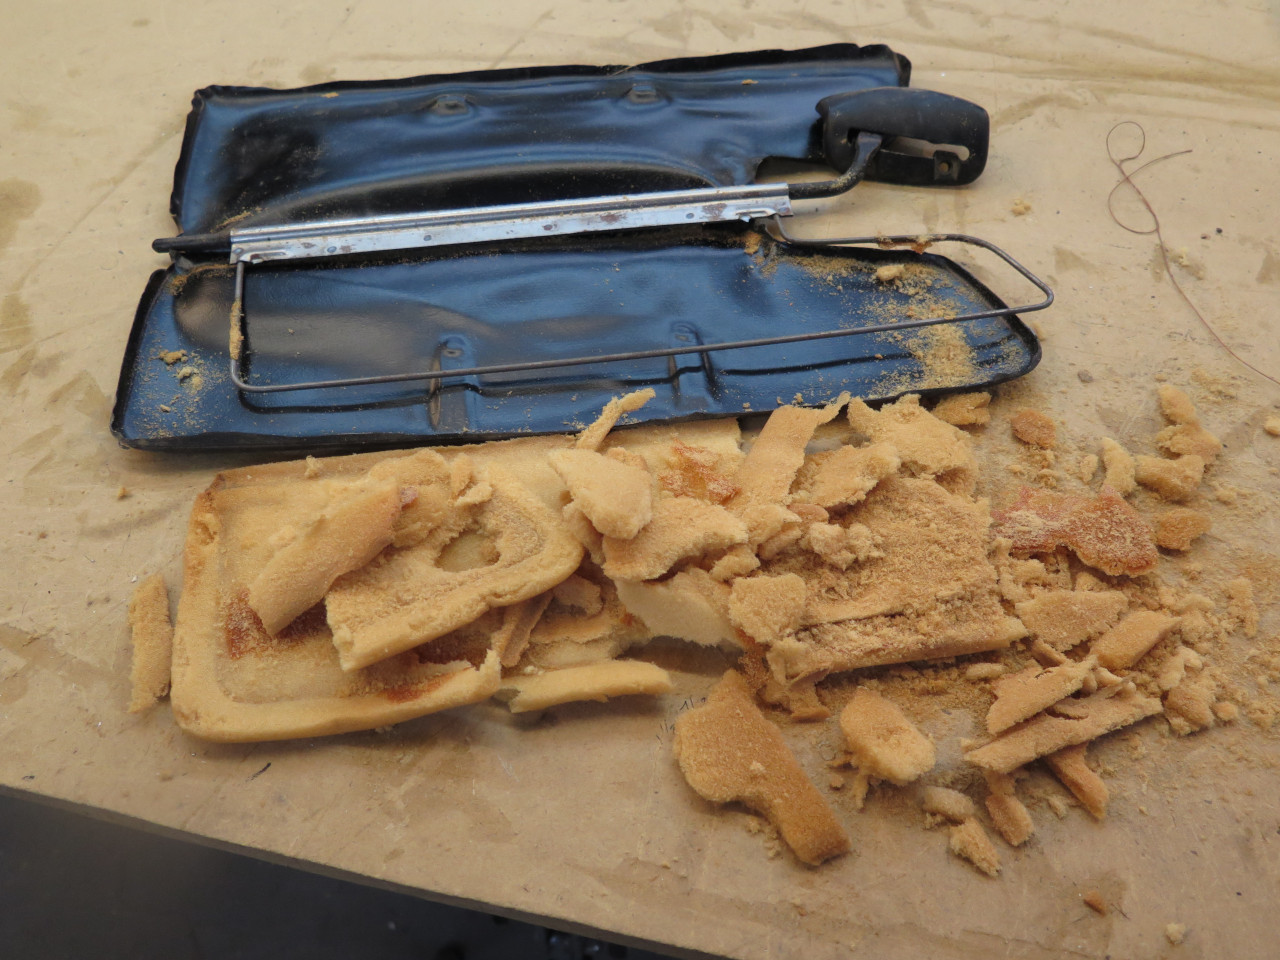
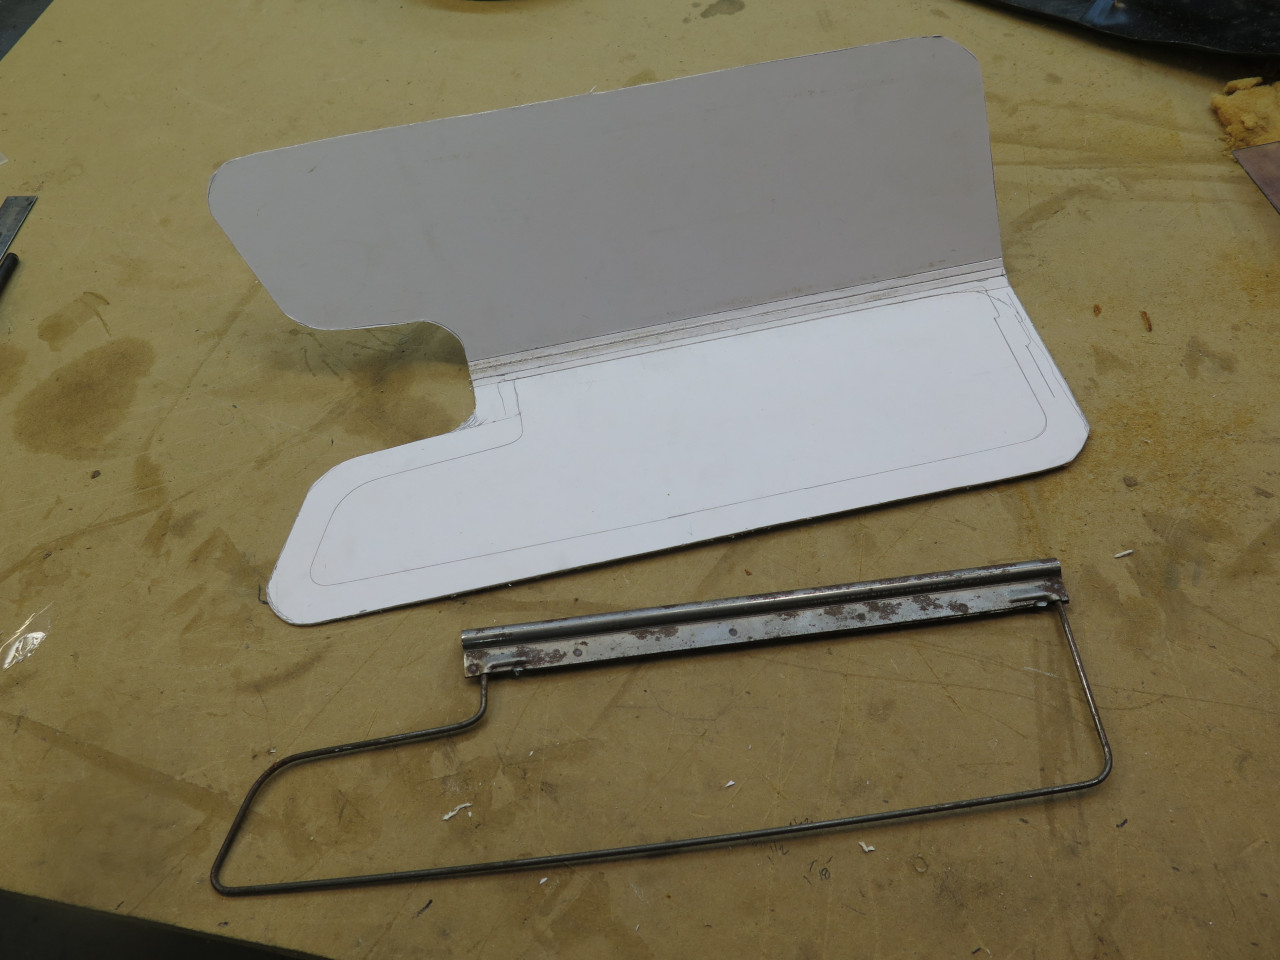
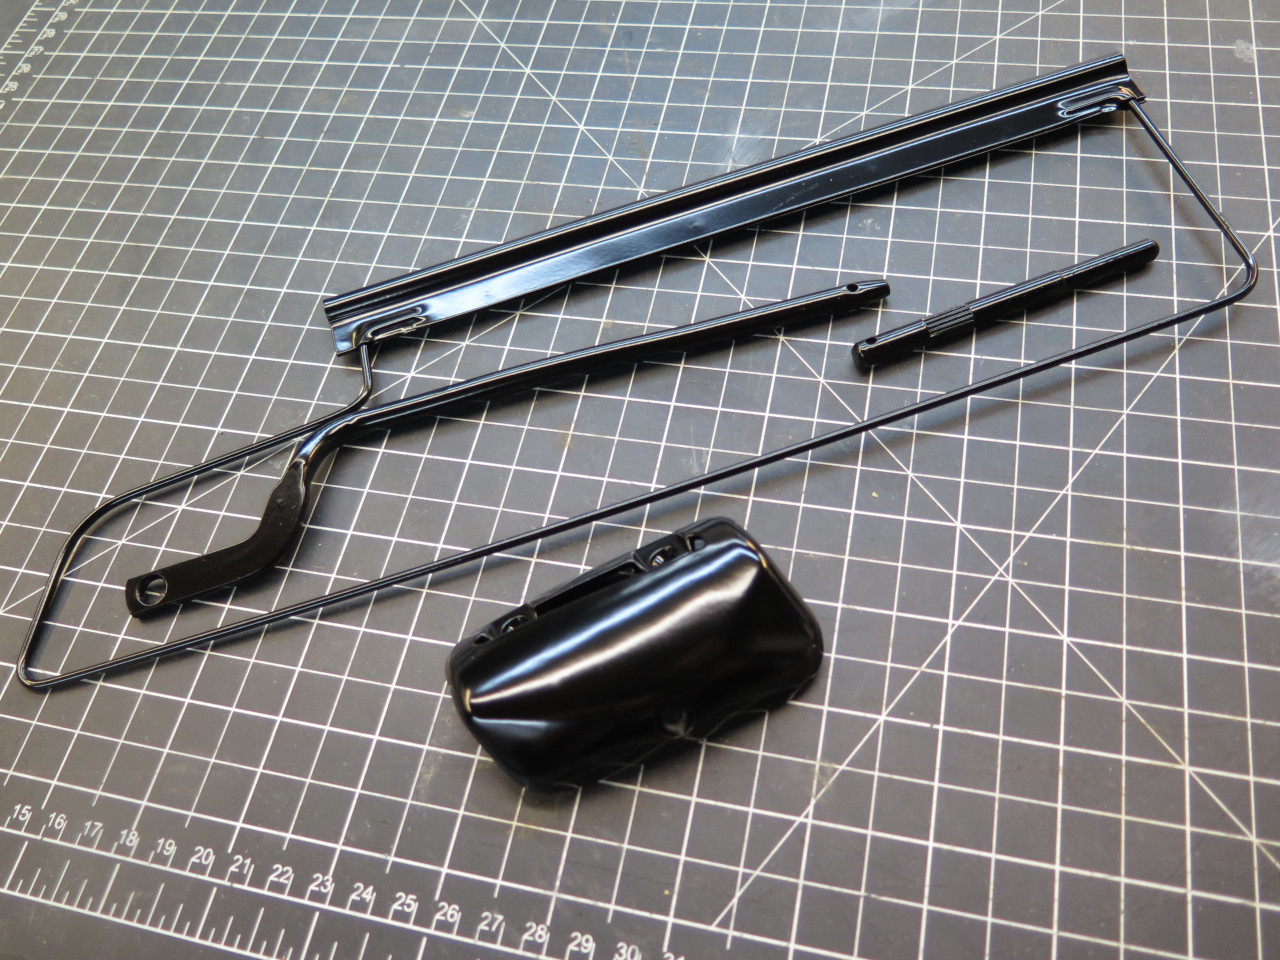
The only real structure inside was a wire frame attached to a metal
tube. It's likely that the construction and materials used in
these devices was influenced by US safety regulations of the time.
More substantial innards might risk slicing off the top of someone's
skull in a front collision.
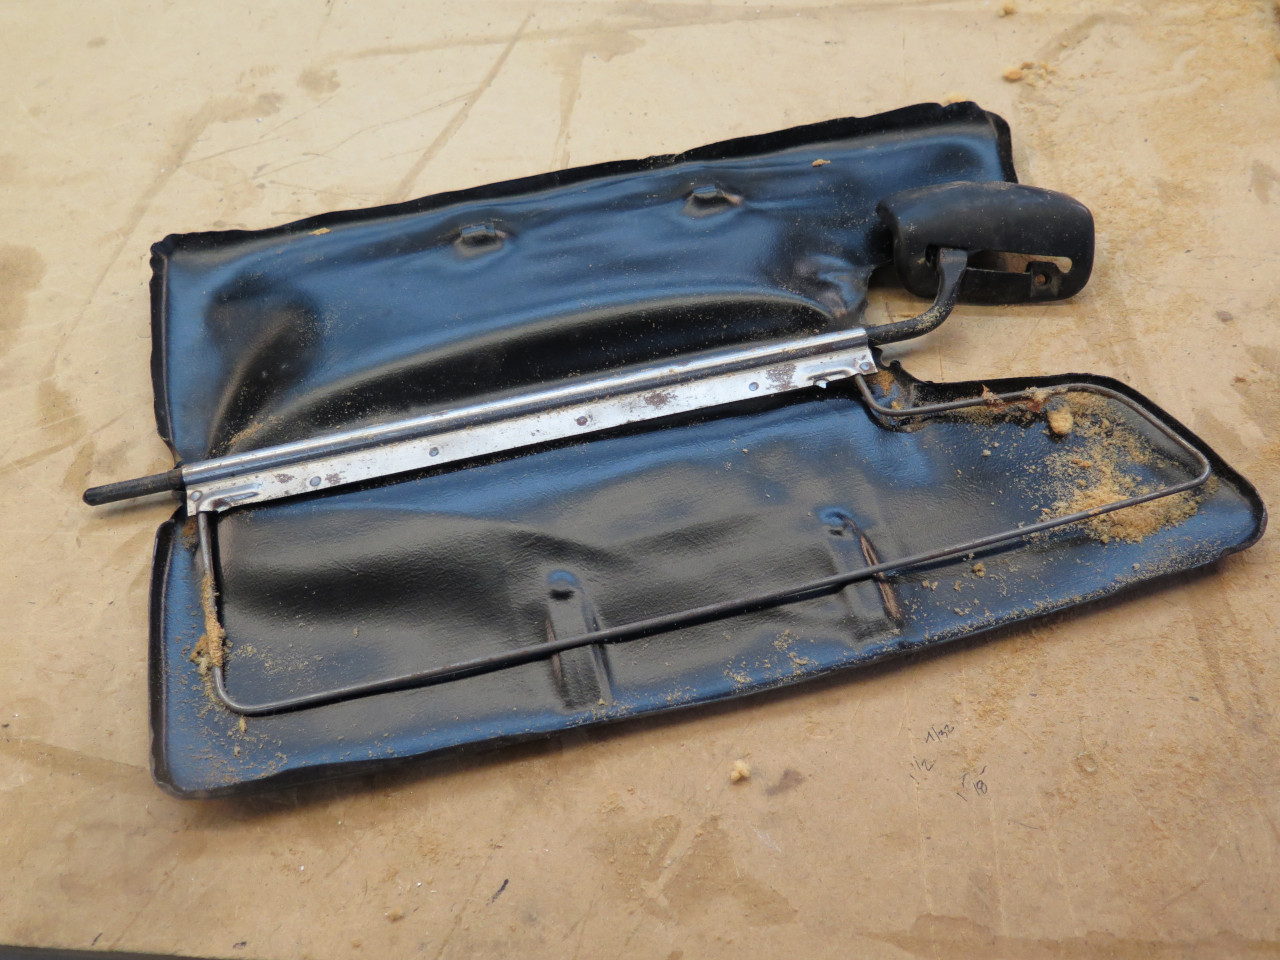
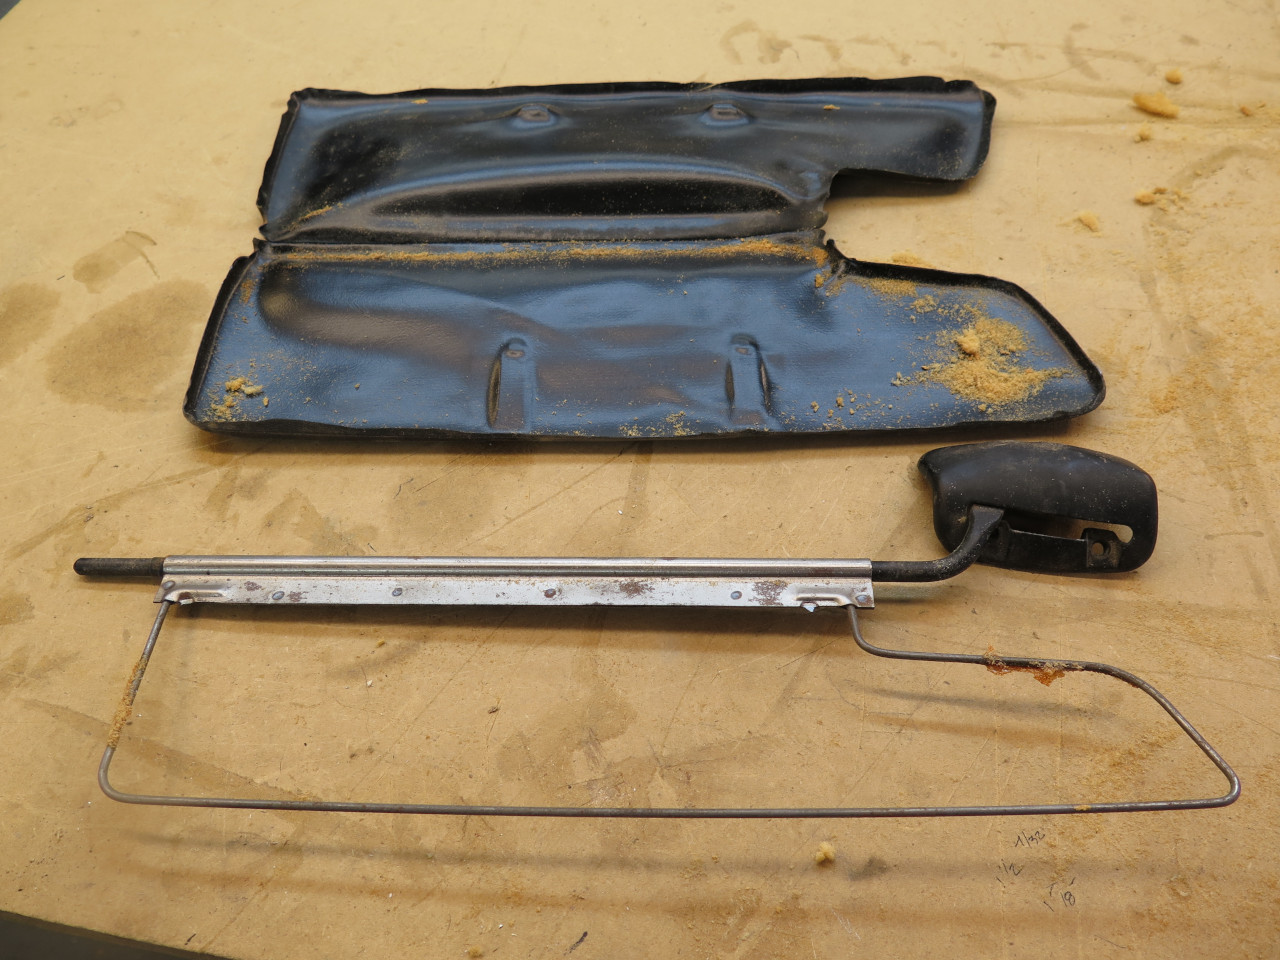
There was a rod friction fitted into each end of the tube. The
longer rod is the arm that the visor can rotate on. The shorter
rod clips into a little holder on the windshield frame to support the
loose end of the visor.

Now, aftermarket replacements are available for these visors. and they
aren't all that expensive. On the other hand, it seemed to me an
interesting challenge to try to refurbish the ones I had. It fits
the spirit of the overall project, and I didn't have much to lose in
trying.
A little research taught me that modern visors are often have more of a
clamshell construction, and this seemed like a better DIY
approach. In keeping with the use of relatively weak, collapsible
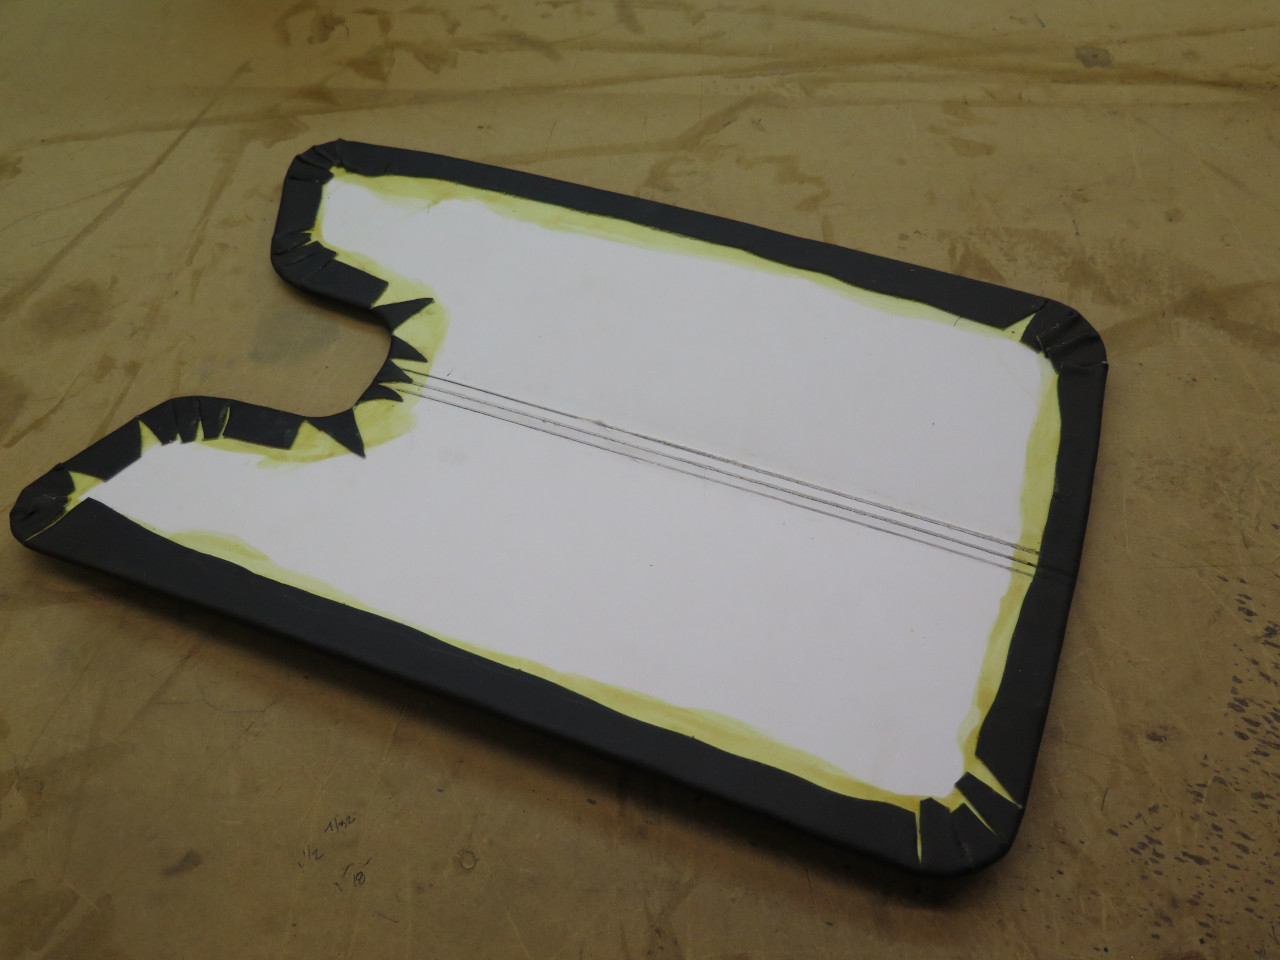
materials, I decided to try some card stock for the body of the
visor. This is basically poster board, about 1 millimeter
thick. It was cut to match the shape and size of the original
units. It is designed to wrap around the original wire frame to
form the clamshell.

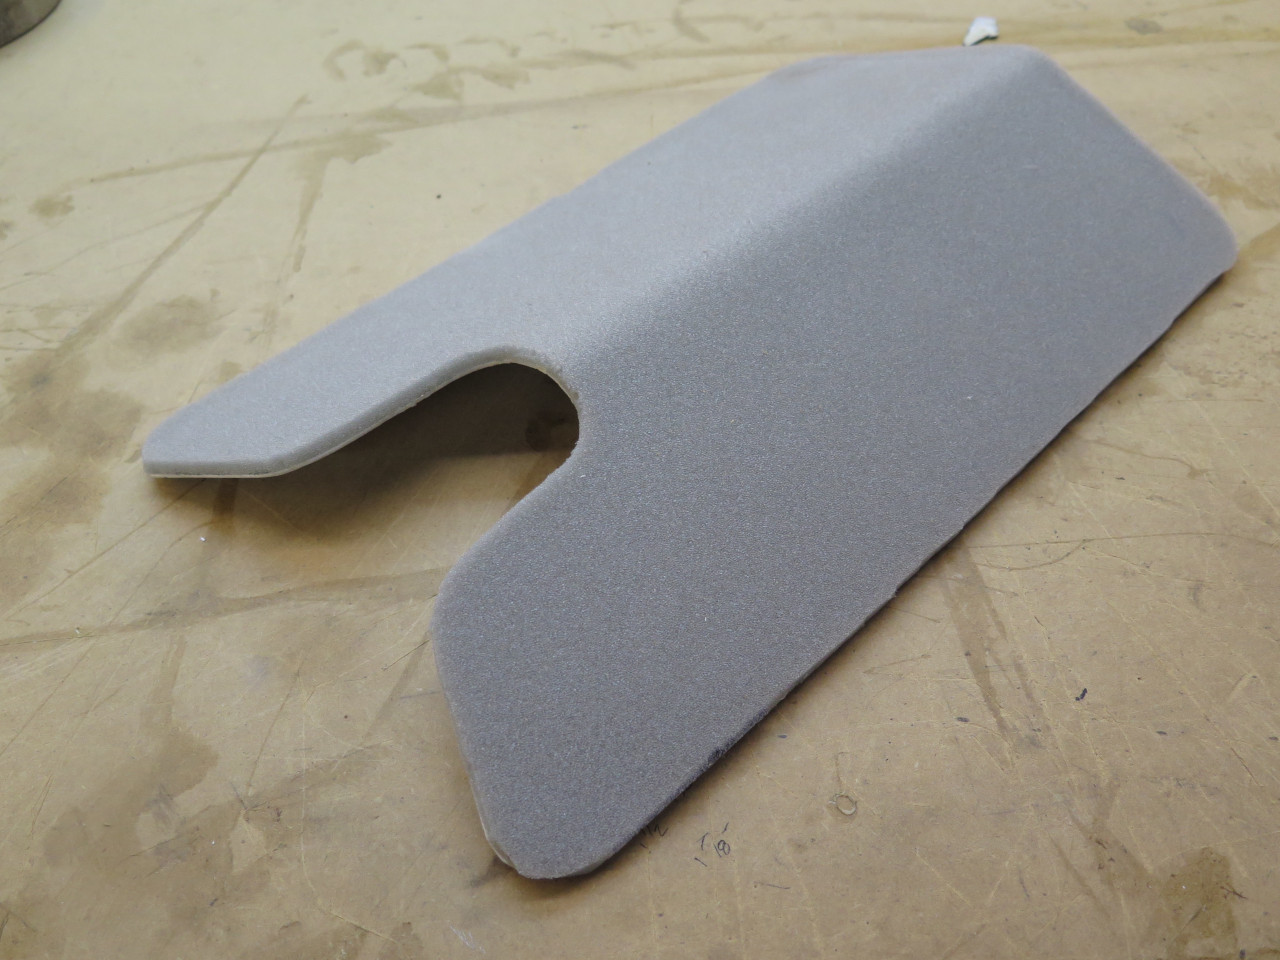
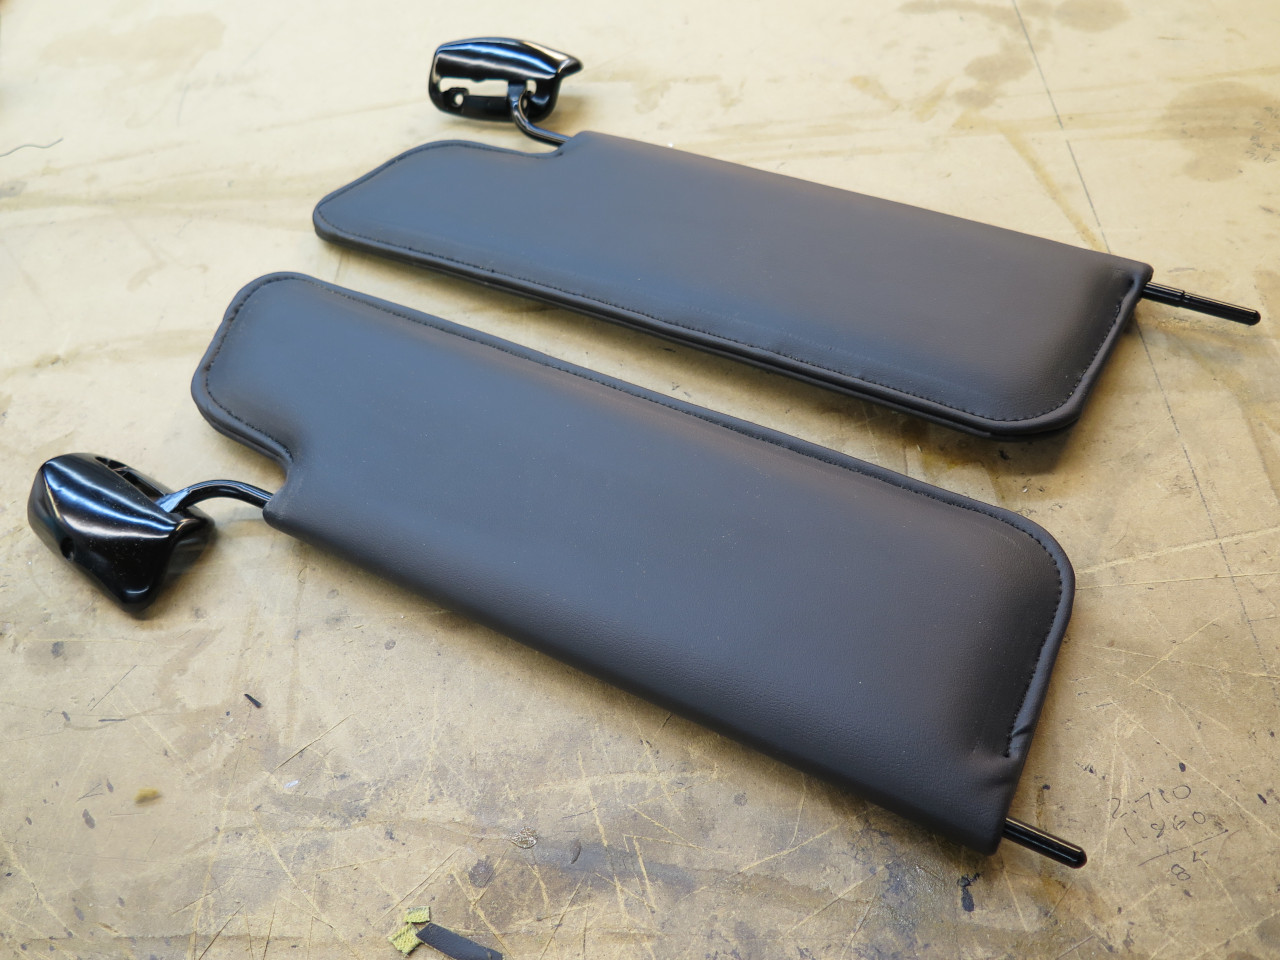
For some bulk and a little plushness, 1/4 inch upholstery foam was then glued to the card stock.
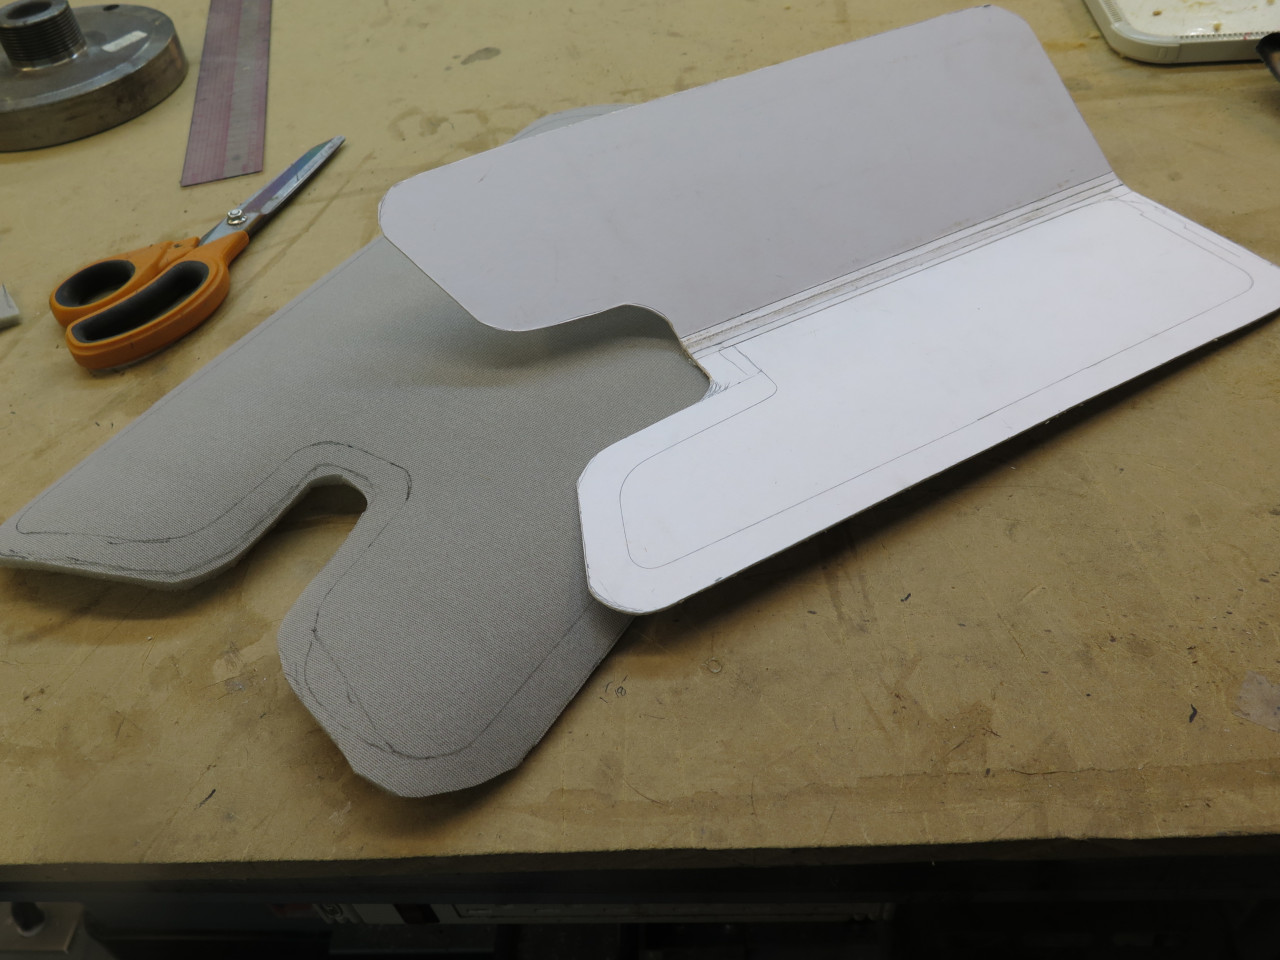
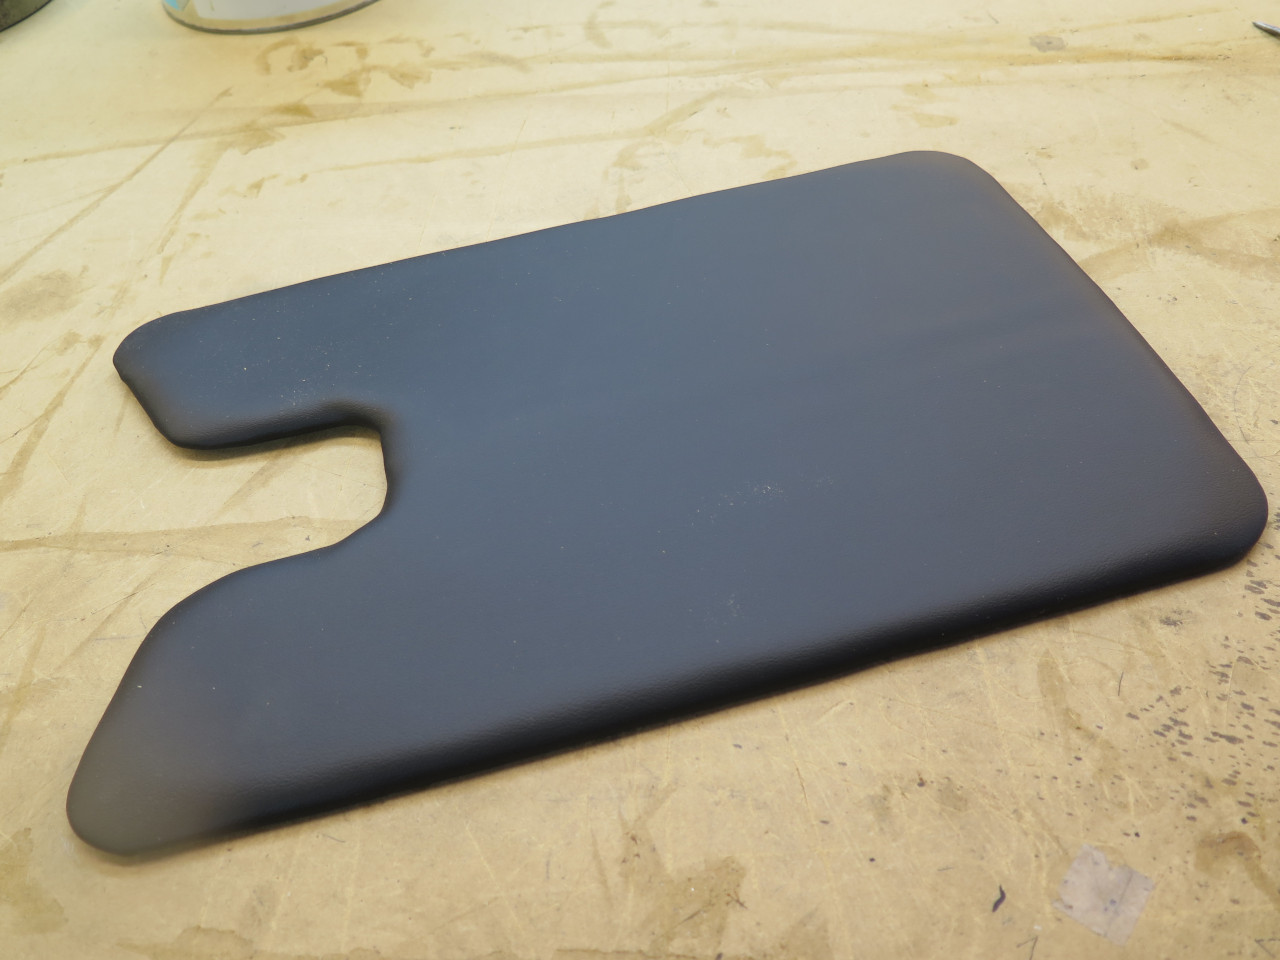
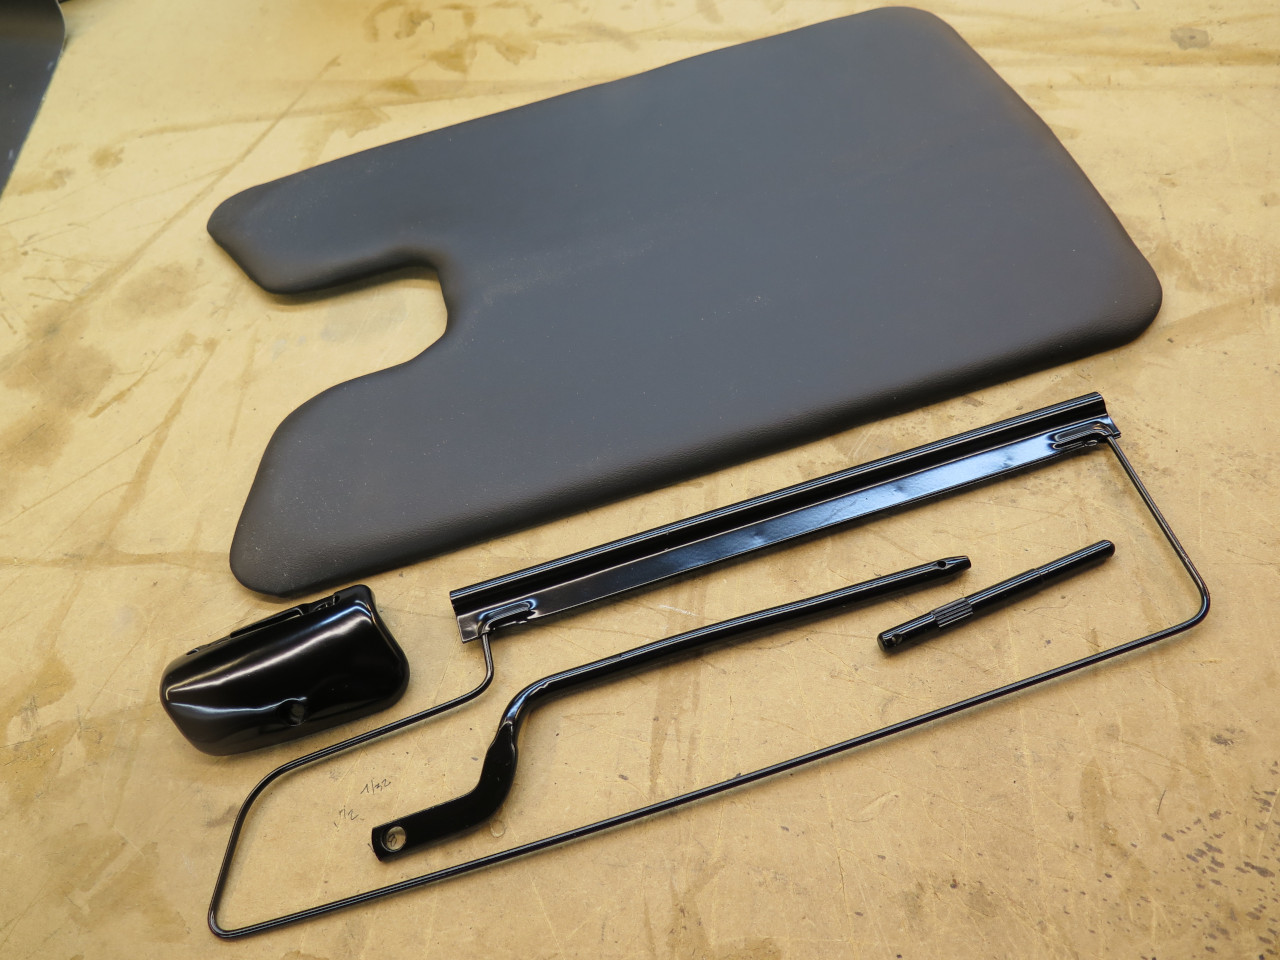
Then the assembly was wrapped with some nice black automotive vinyl.
Before I could go any further, I had to get the metal parts ready, first blasting all the paint and rust off.
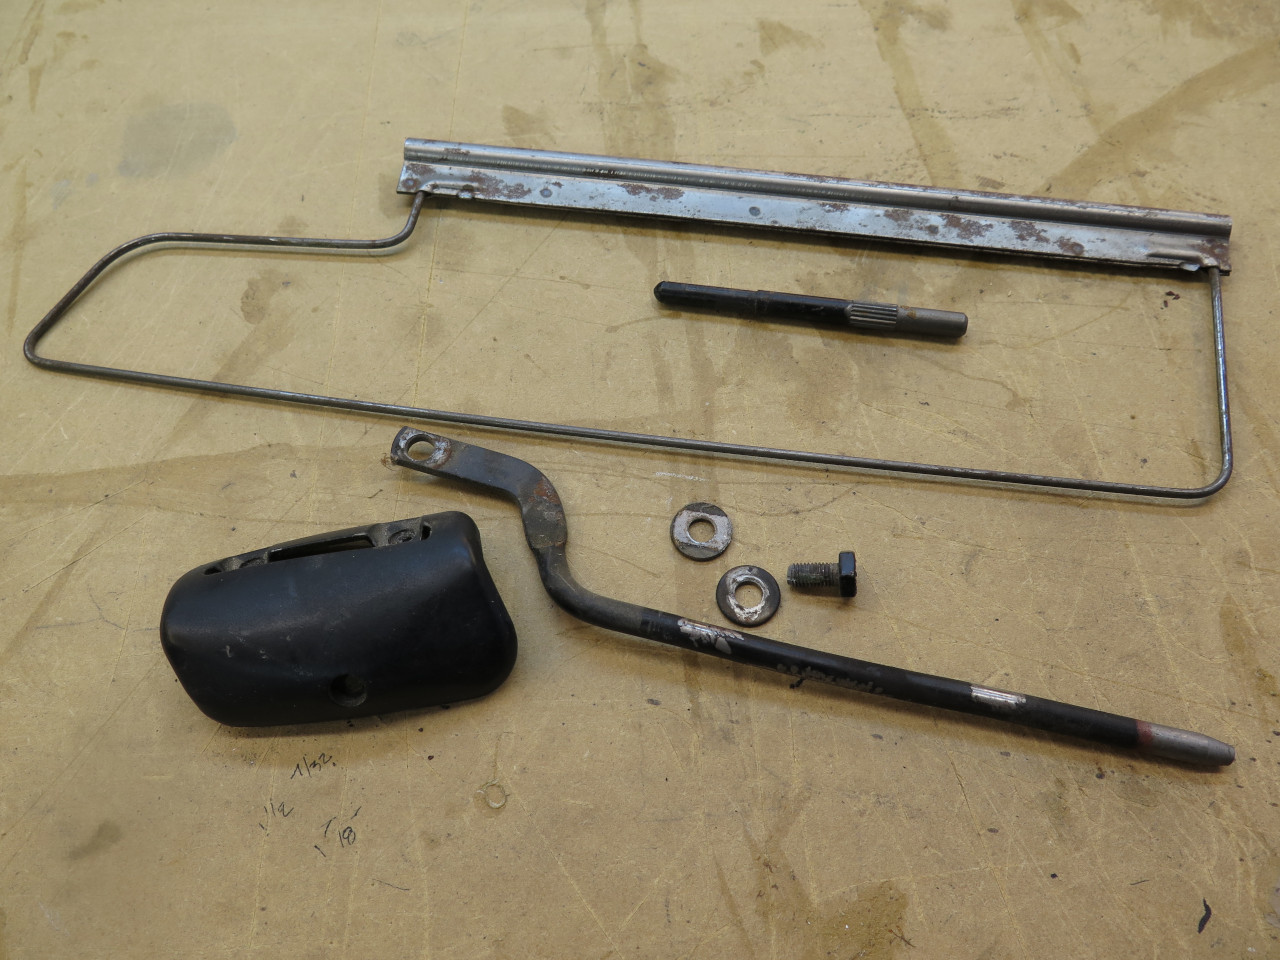
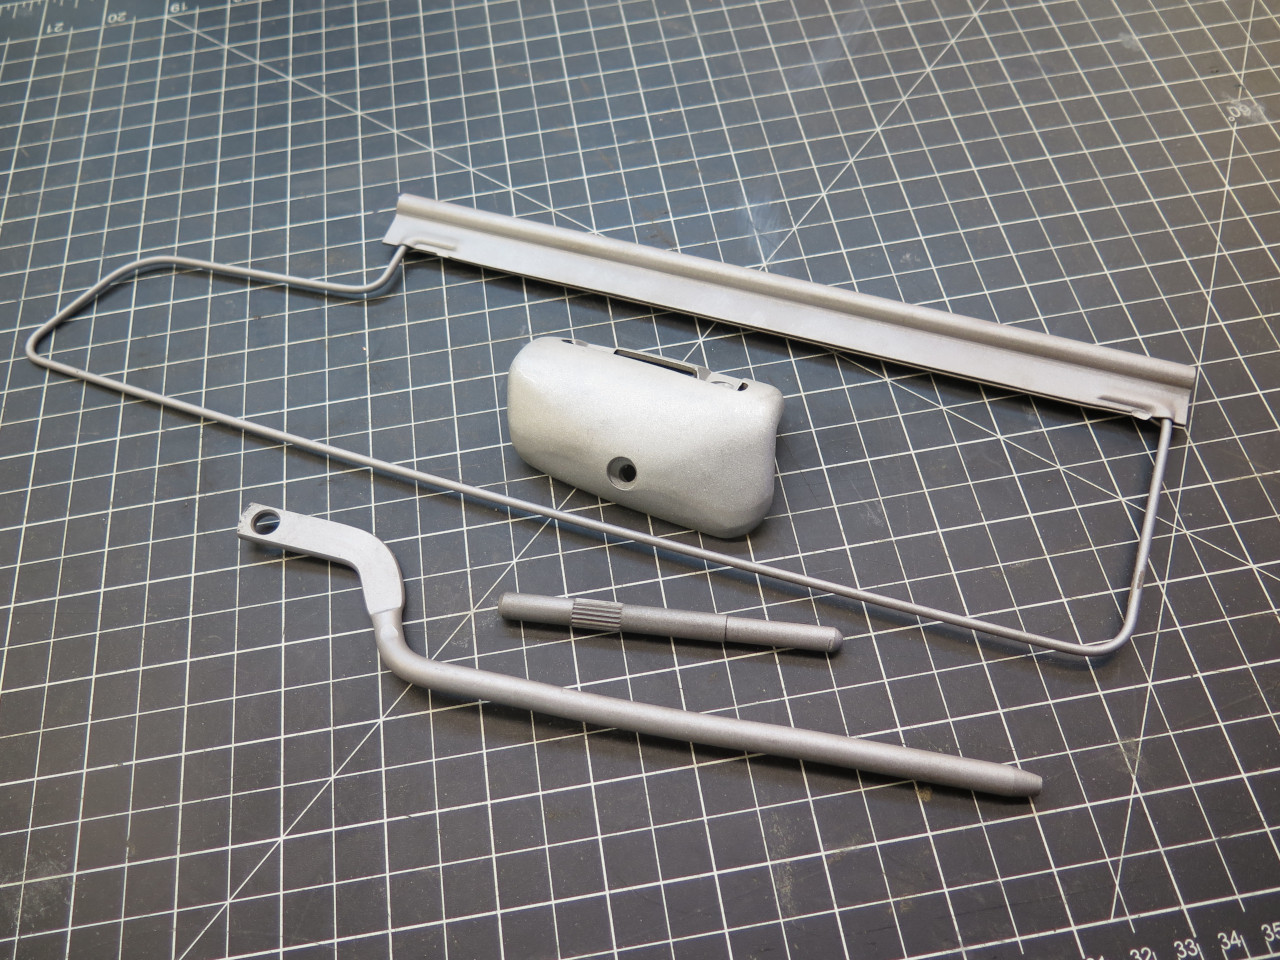
An interesting note is that the stiffness of the visor rotating on the
swing arm rod was accomplished by distorting the rod slightly so that it
binds in the metal tube by just the right amount. The rods on
both visors have identical kinks.
Then a nice powder coat.
The wire frame is positioned and taped in place.

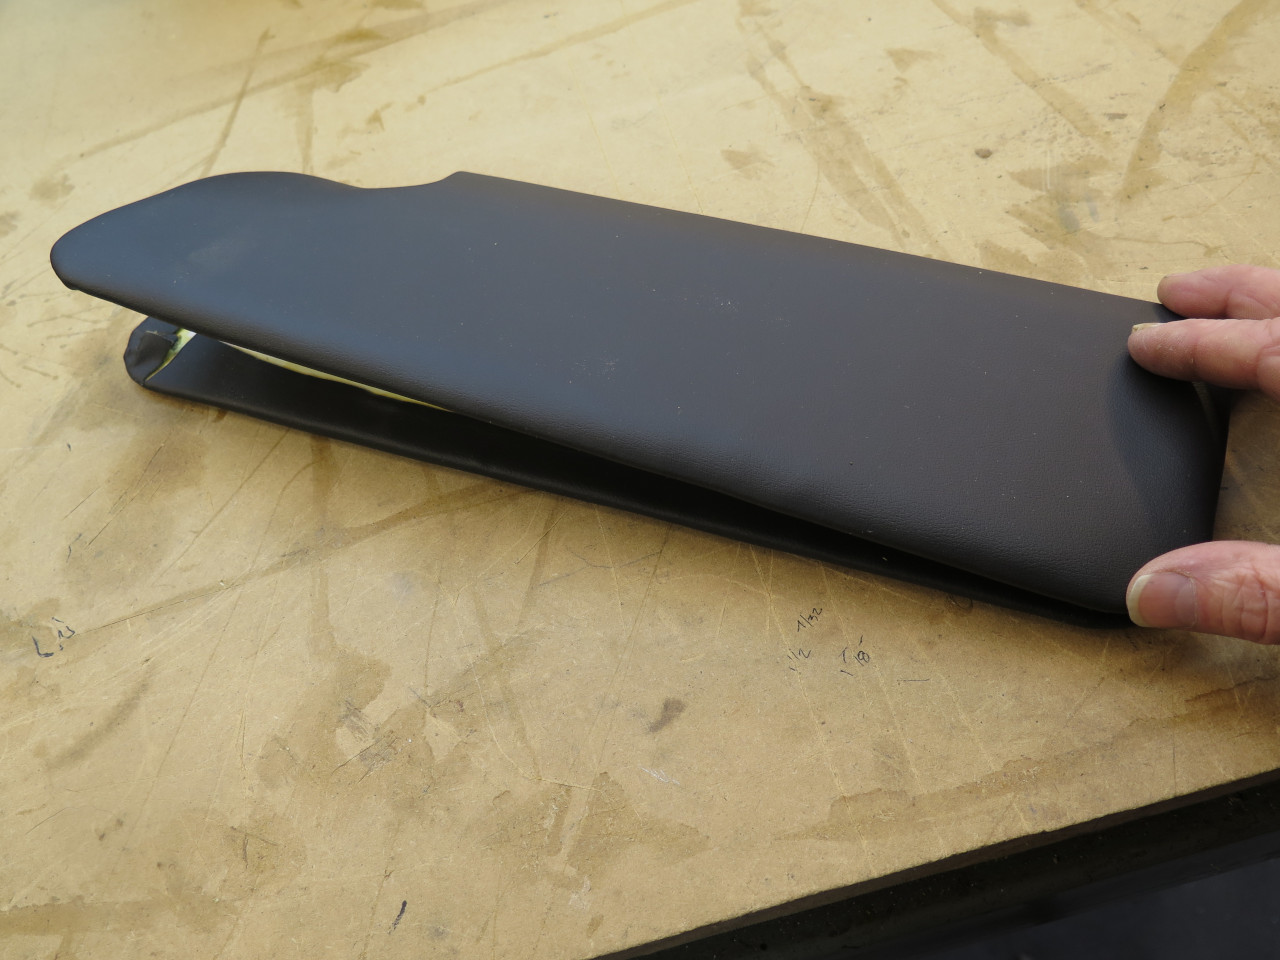
Then the clamshell is folded closed.
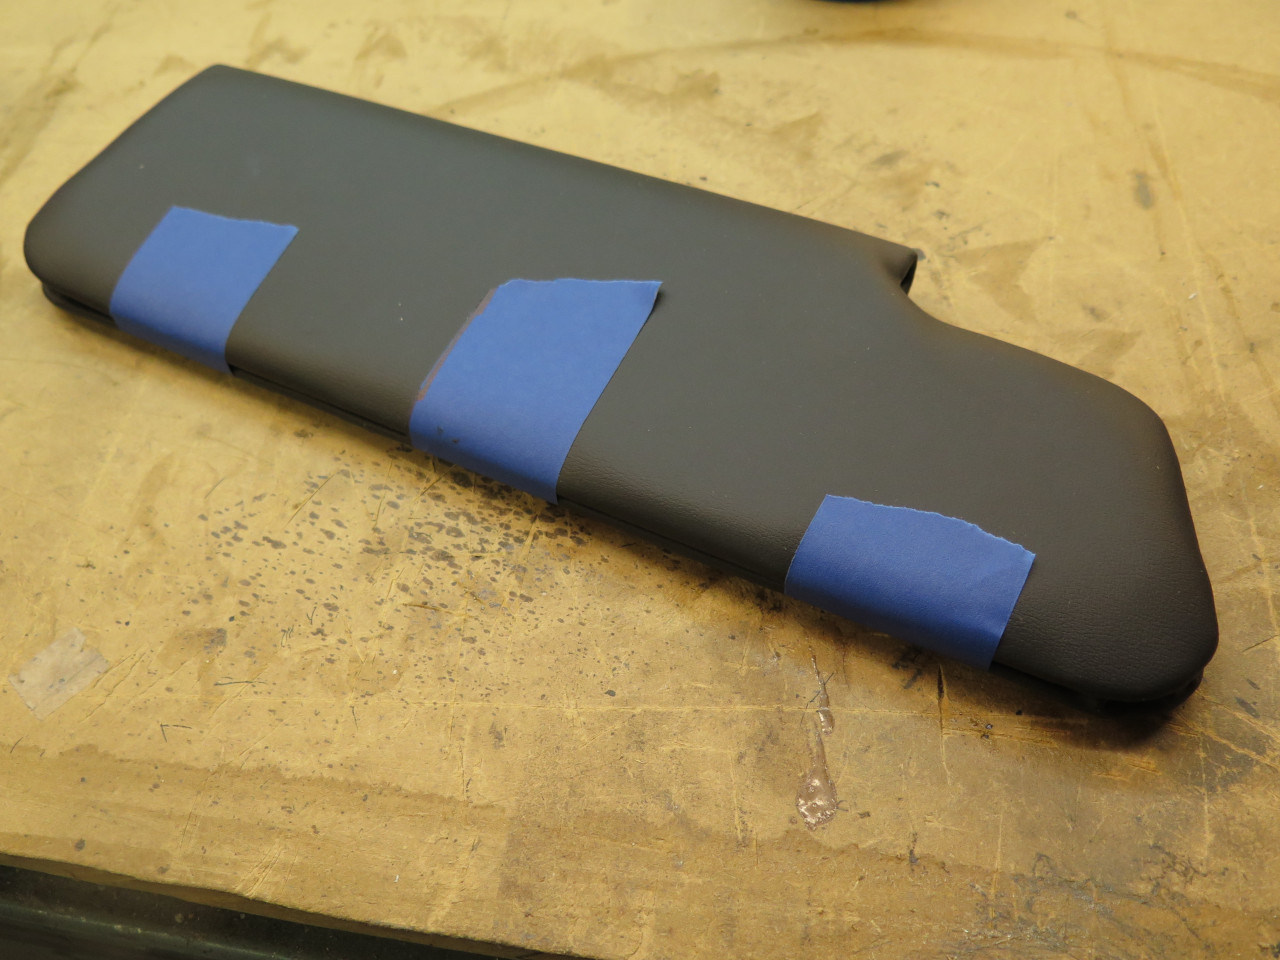
After some thought, I decided I wasn't really that fond of the blue
tape, so I considered other ways of securing the clamshell closed.
Some modern visors are sewn shut, so I decided to try that. The
main issue is that at the edges that need to be sewn, the assembly is
around 1/2" thick, and my sewing machine didn't like that one bit.
It moaned and groaned about it, but it did manage to sew the
seam. The stitching is not as regular as I'd like, but I'll see if
I can live with it.
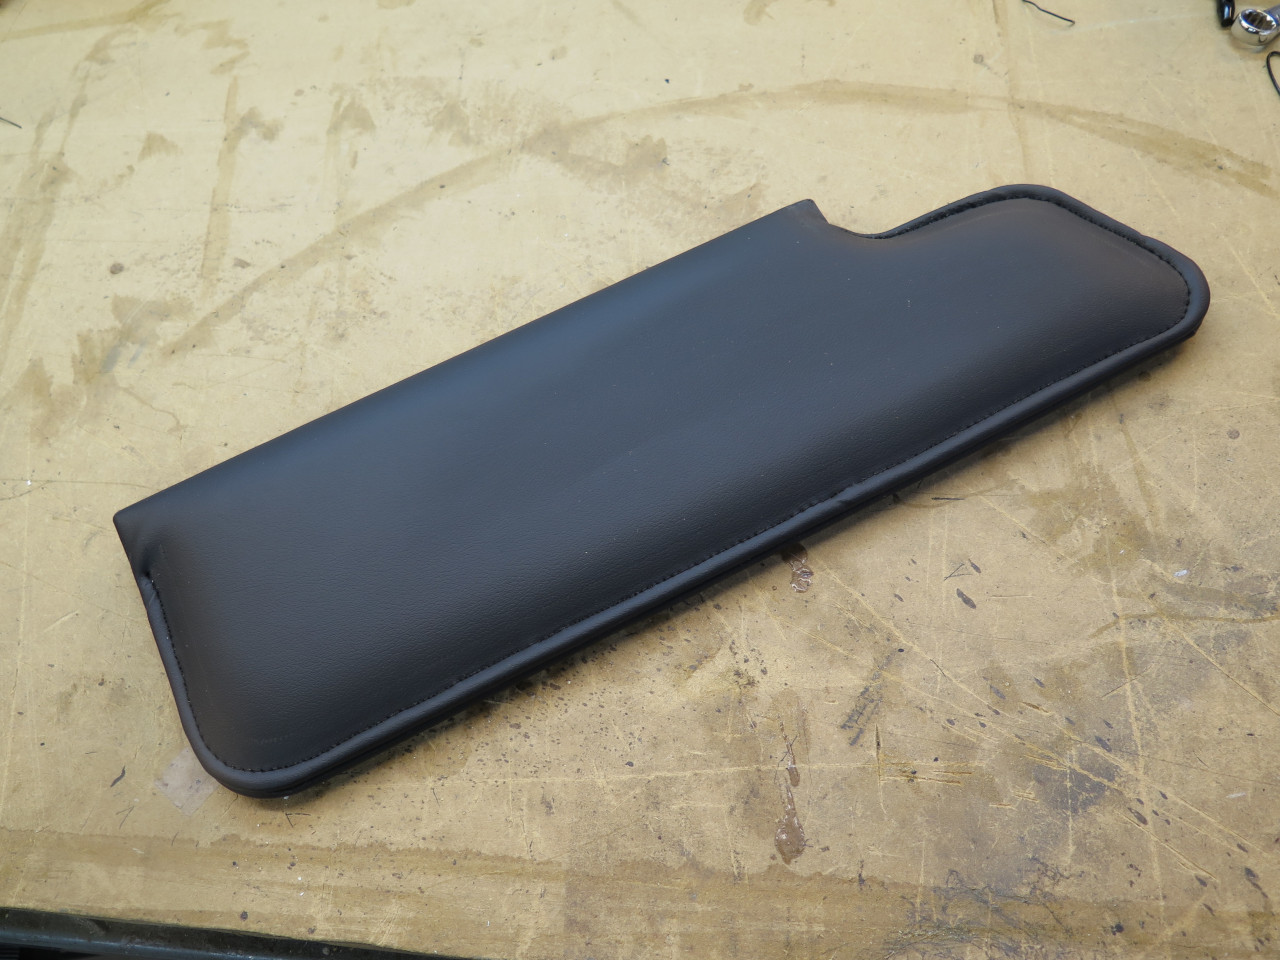
Then applied the metal parts.
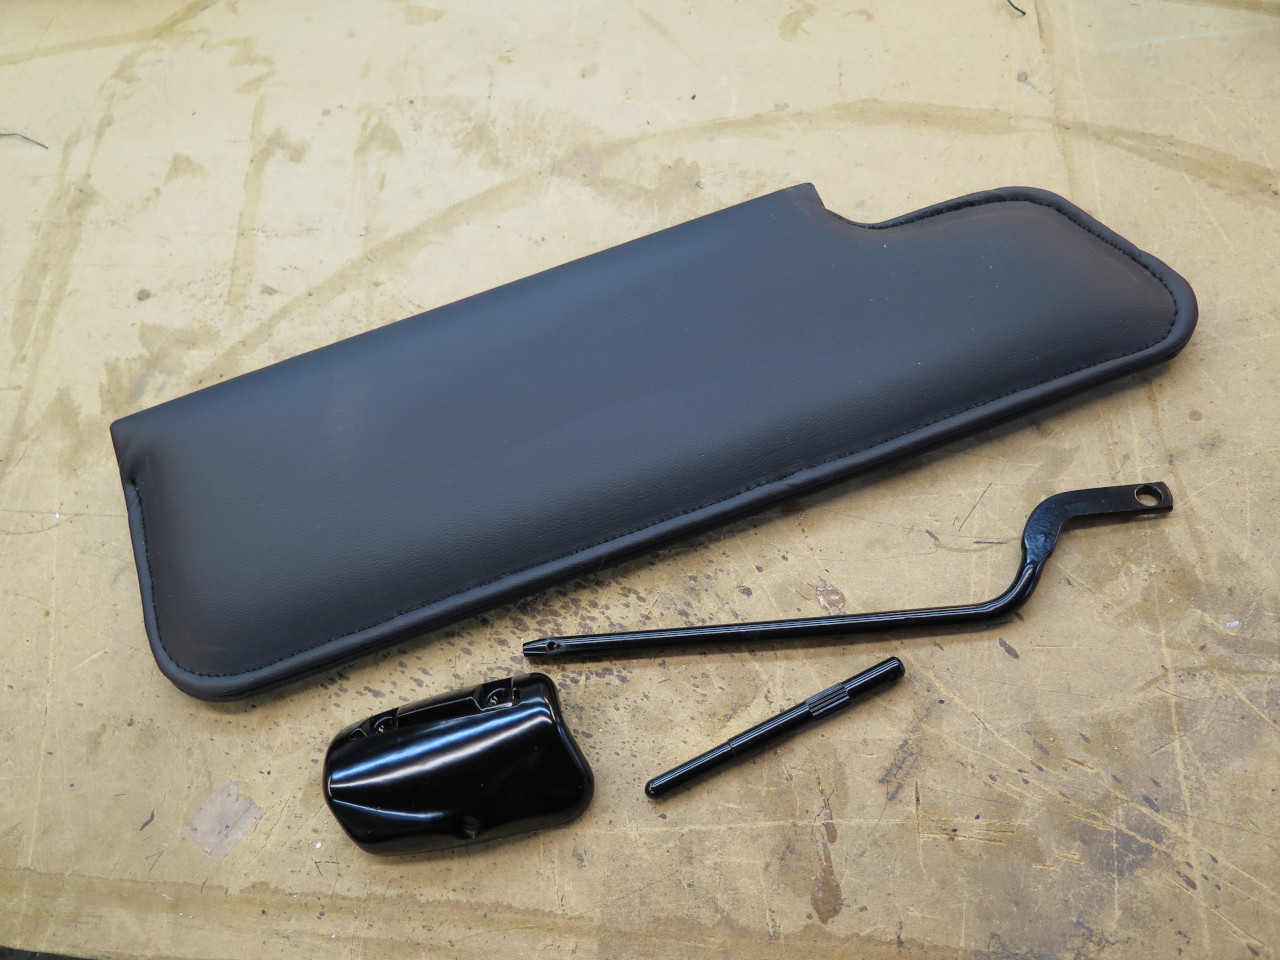
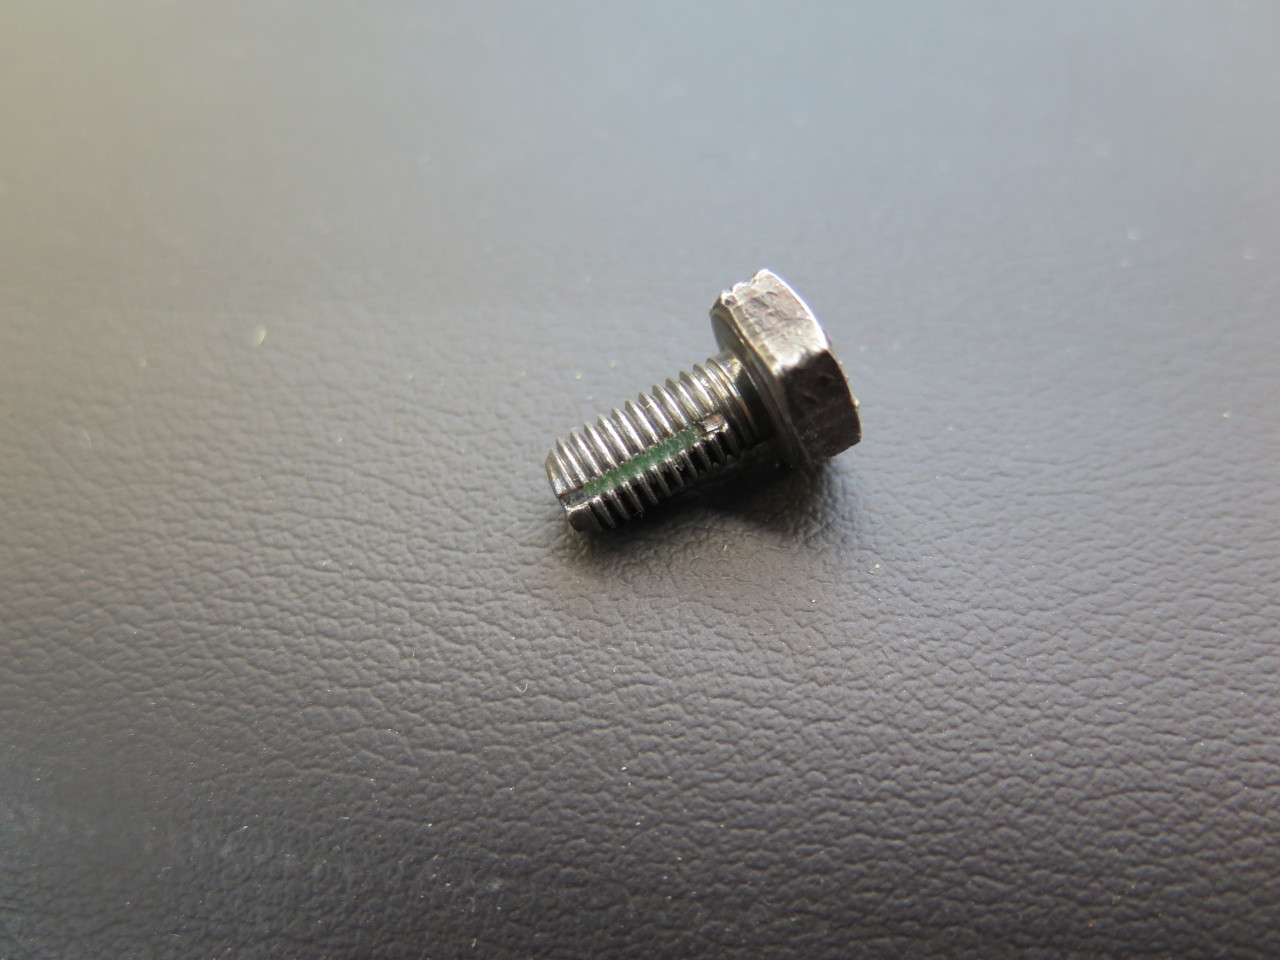
This is the bracket that holds the swing arm to the windshield
frame. One interesting thing is that the bolt that acts as a pivot
is actually a lock bolt. It has a little nylon insert that
distorts to bind the bolt against loosening.

As with most things that come in pairs, I usually do one at a time in case I have to refer back to the untouched one.
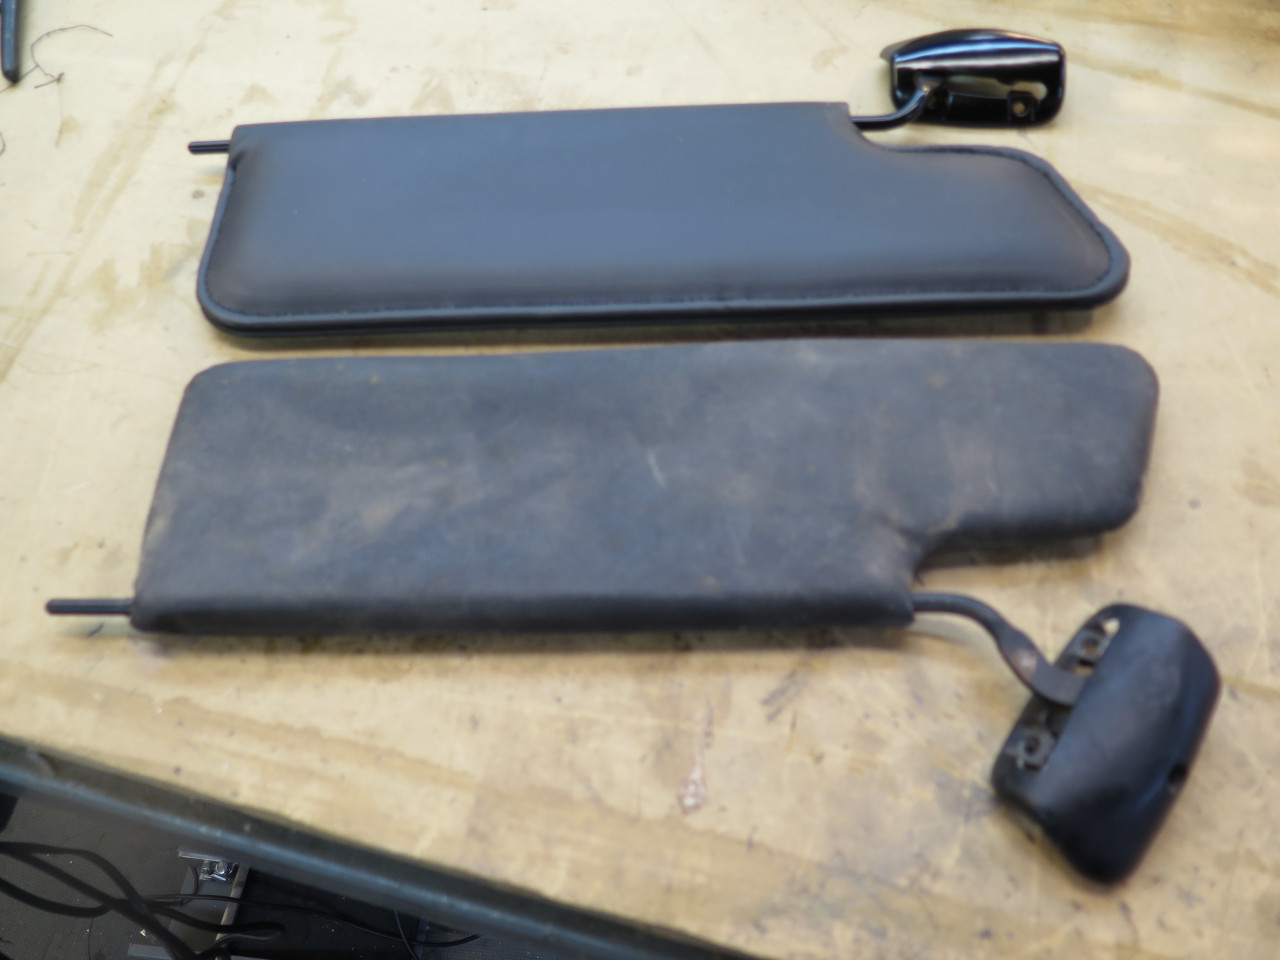
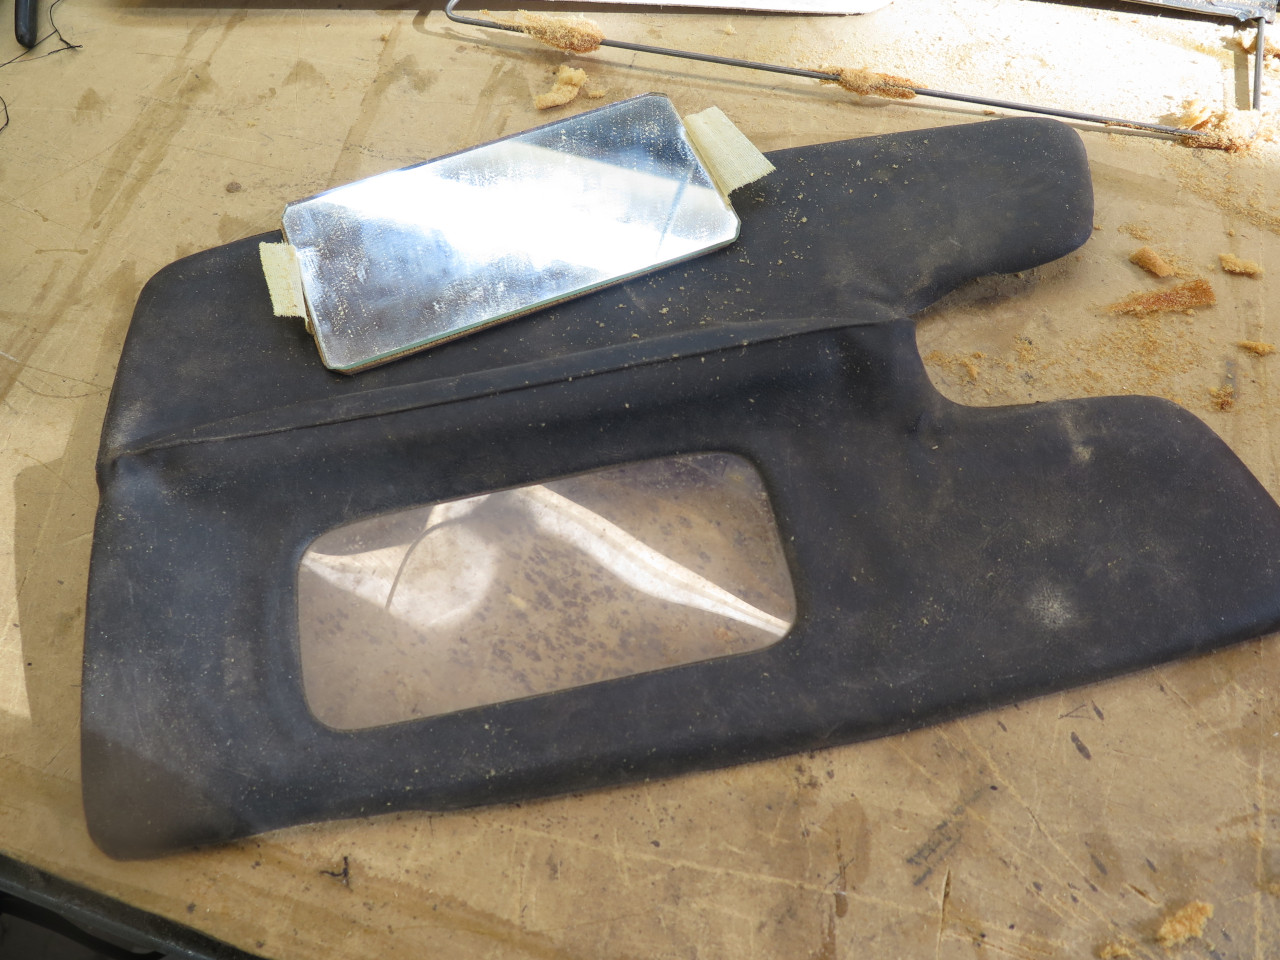
The passenger side visor included the obligatory vanity mirror.
The design was problematic though, because the mirror was behind a clear
vinyl window. This made it impossible to clean the actual mirror,
and any crud that got between the mirror and the window was
unreachable. I decided to defy tradition and not include a vanity
mirror.
On the shelf with these dudes.
This was a sort of fun project. It was one of those happy projects
where I had everything on hand, and didn't have to buy anything, so
there was no explicit cost.
I think the visors came out fine, but I'm not totally satisfied with the
stitching. My machine could handle the layers OK, but the
thickness threw off the geometry, and it wasn't feeding
consistently. If it bothers me too much, there are always
the aftermarket ones available.
Comments to Ed at elhollin1@yahoo.com
To my other GT6 pages